From base tools to master-craft gear
A solo-player’s guide to crafting in Star Citizen patch 4.9
Learn the systems, tools, resources, and practical decisions that turn raw materials into dependable equipment, without relying on a crew.
Useful Links
Navigation
Introduction
What is crafting
In Star Citizen’s 4.9 patch crafting is the act of gathering materials and blueprints to produce equipment, for both the player character and ships, which has better-than-store purchased stats. Materials are gathered through mining and refining. Blueprints are awarded from completing missions.
Why does it matter
Every player has at some point thought to themselves “That’s a long jump,” and then minimized the game while in quantum travel. Even with the ‘best’ size one drive, the Civilian Grade A “Atlas,” a standard jump from Hurston to MicroTech, a 68 Gm jump takes approximately 5 minutes 30 seconds, and will require most size 1 ships to refuel using just shy of a SCU of QF. A crafted version of the same drive, with good but not excellent quality materials knocks the travel time down a whole minute, 4 minutes 20 seconds, and use about .75 SCU of QF, for most size 1 ships allowing a full loop route before needing refuel. These quality of life improvements are more pronounced in larger ship classes and with higher quality crafting. The time saved across a play session increases dramatically as crafted gear is used.
The Loop
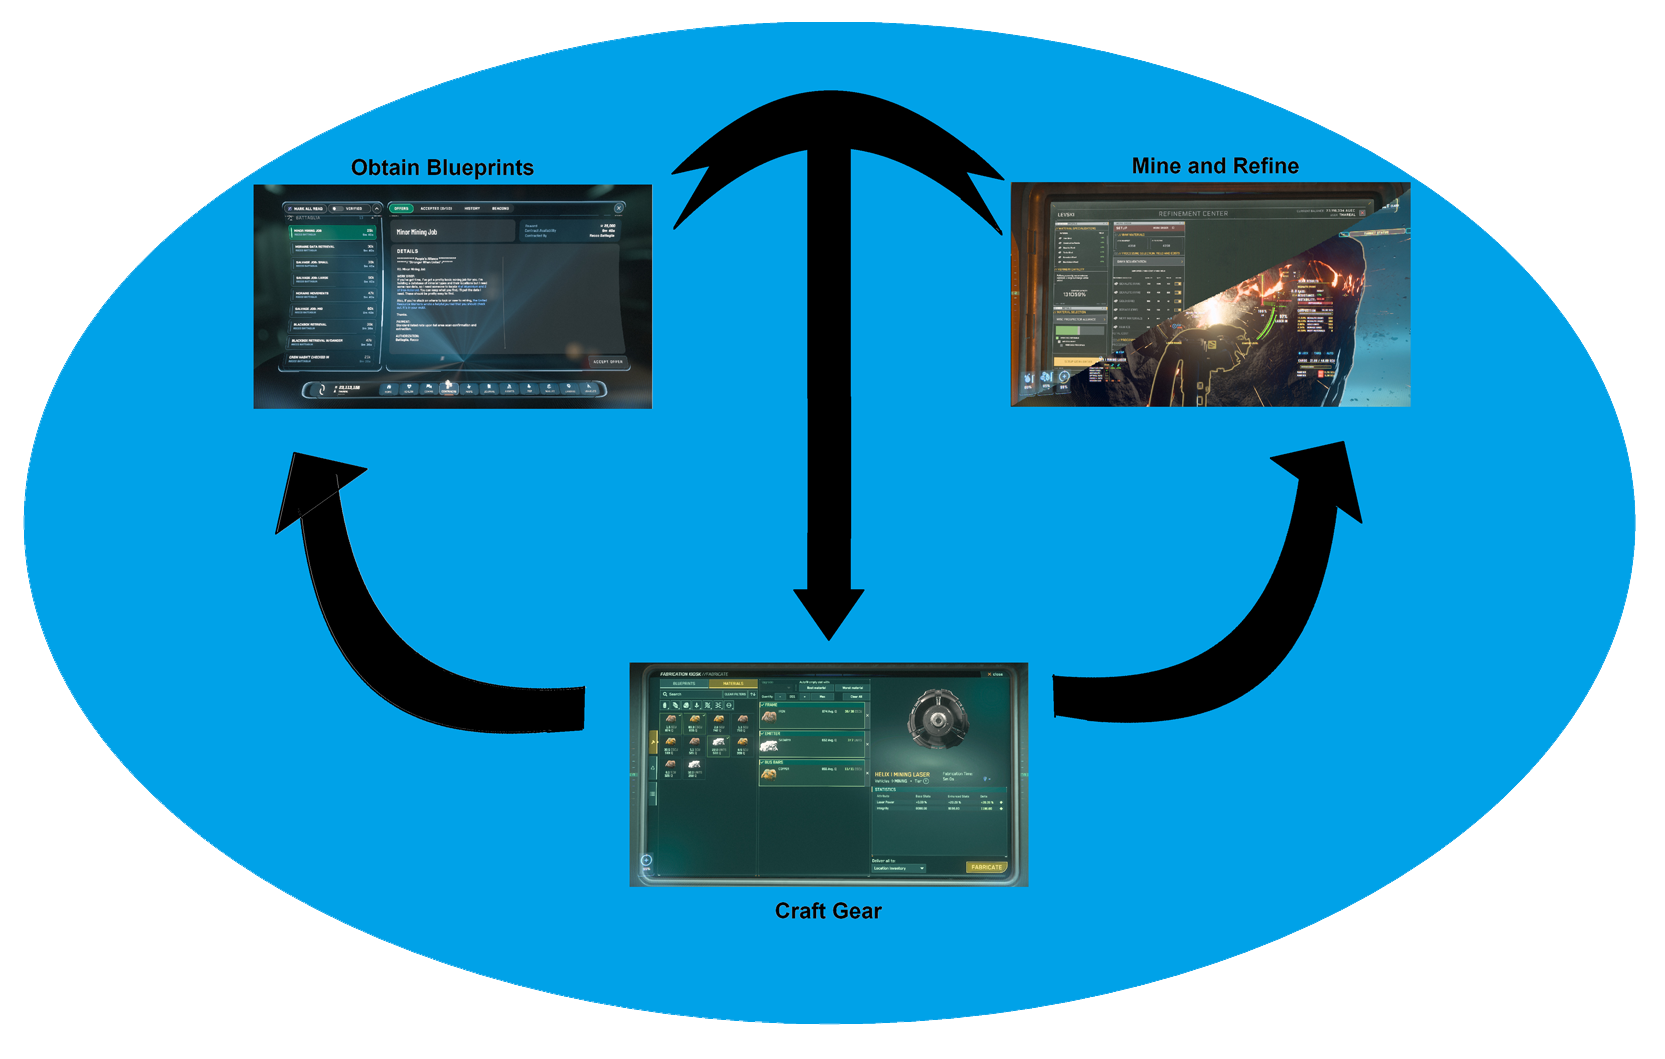
RSI always discusses things in terms of gameplay loops. For crafting the loop is as follows: Obtain Blueprints, Mine and Refine, Craft, repeat.
Obtain Blueprints
Blueprints
Blueprints are required to craft any in-verse item. The vast majority of anything you can
purchase from a retailer or find while looting can also be crafted. To get access to these you must complete
missions for a given faction that often has relation to the blueprint being awarded. Generally
speaking doing ship to ship combat will reward combat components. Hunting bounties on foot will
reward FPS gear blueprints. Often to get access to desirable components reputation must be
increased with these factions to access higher level missions. The required mission chain for any
given blueprint can be referenced at SCMDB or SC-Craft Tools
Starting Blueprints
It is recommended that players starting their crafting journey obtain blueprints from Recco Battaglia, in Nyx, or Shubin Interstellar, anywhere in-verse, to access ship bourn mining heads. This will aid in your ability to pursue solo crafting by upgrading your mining capabilities.
Reputation Grinding
Many desirable blueprints are locked behind contractor-to-contractor based reputation levels. It is recommended to pursue missions which take the shortest amount of time and give the highest reputation gain, but only if the missions are routinely completable. Some missions, especially those associated with mercenary work, have major difficulty spikes as increasing reputation levels unlock new missions. It is better to put in multiple 30-minute missions which you are certain you can complete than one 45-minute mission you may or may not complete, even if it has 2x the rep gained-per-mission. SCMDB has the per-mission rep rewards broken down and databased.
Mine and Refine
Getting a mining vessel
Which vessel you use is entirely your choice and they are essential to the crafting process. When operating alone the MISC Prospector has the best power output which is the most relevant stat for determining if a given deposit can be mined. Vessels can be purchased in-game, purchased via war-bond, or earned through rep-farming.
Purchasing In-Game
Prospectors and Golems can be purchased for 2.8 and 1.05 Million aUEC respectively from Hurston in Stanton, Bloom, Monox, Terminus LEO stations in Pyro, and specifically the golem from Levski in Nyx.
Purchasing via War-Bond
RSI sells both the Prospector from $155 USD and Golem for $60 USD on their webstore. The prospector is available as a base-game package which includes Life Time Insurance (LTI). Both are available for 6-month insurance. Purchasing a ship via War-Bond ensures it's available immediately even after post-patch server-wipes.
Rep Grinding
New to 4.9, both ships can be earned by doing missions for Recco Battaglia in
Nyx. Her ships come with a unique hull in yellow-and-black as well as coming with industrial grade-A
components in most ship outfitting slots.
Outfitting
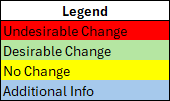
All components on a ship and character are important, however for the purposes of this guide we will focus on only those as they relate to mining. Erkul can be used to simulate ship loadouts as well as provide purchasing locations for any of the base gear you need to get started. If you already know which components you need it may be faster to use the Universal Item Finder database. The effectiveness of your loadout can be tested in the mining simulator Peacefrog's Rock Breaker. The legend to the right applies to all charts in this section.
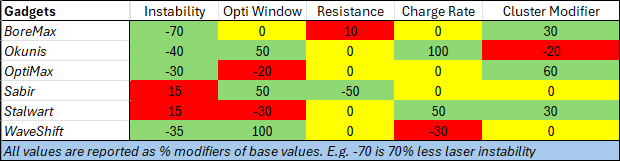
If you are using a Golem your mining laser head cannot be switched. Sections "Mods" and "Gadgets" are most relevant to you.
Mining Heads
Generally speaking, the higher the power output the better. Power output and resistance of any given mining deposit determines your ability to crack and extract the minerals within. Your ability to crack a rock is a direct function of your laser's power output and the rock's resistance. Starting out a Helix 1 laser head is recommended. Below is a chart comparing all available laser heads.

Mods
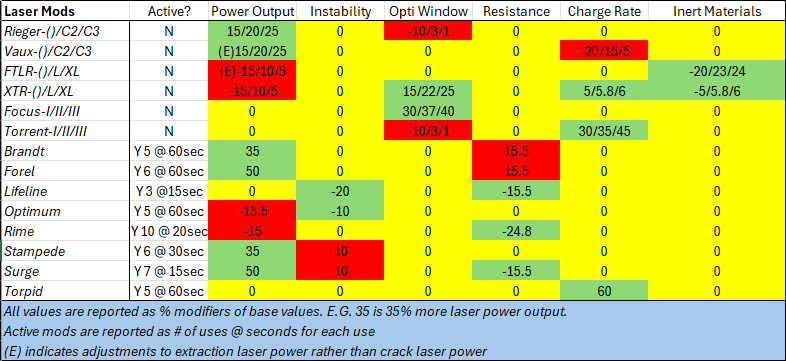
Every laser has 0-2 mod slots, when discussing solo ships. Mods can be used to alter laser behavior. As with laser heads any benefit always comes with some drawback. Mods can be swapped on-the-fly while out on a mining site, and it is recommended to switch to what you need most in any given situation while mining. Below is a chart comparing all available laser mods.
Gadgets
Gadgets are semi-consumable equipment placed from your personal inventory on a deposit before you go to mine. Most notably, gadgets have the ability to modify ore "Clusters". They should be repaired using an SRT or SRT-Lite between each use, and can be destroyed if a deposit is overcharged. Below is a chart comparing all available mining gadgets.
Finding a Deposit
Locating a deposit is more simple than the game will let on. Firstly, on your in-game starmap, Nav tab (F2) in the mobi-glass, any location can be click to determine what ores can be found there. This is semi-incomplete as the starmap will not inform a player what can be found at lagrange (L-1) points or asteroid belts. SCMDB has catelouged every site in-verse as well as provided standard scan signal sizes.
Performing a Scan
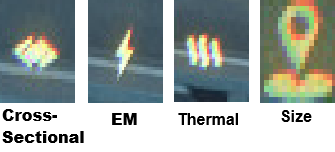
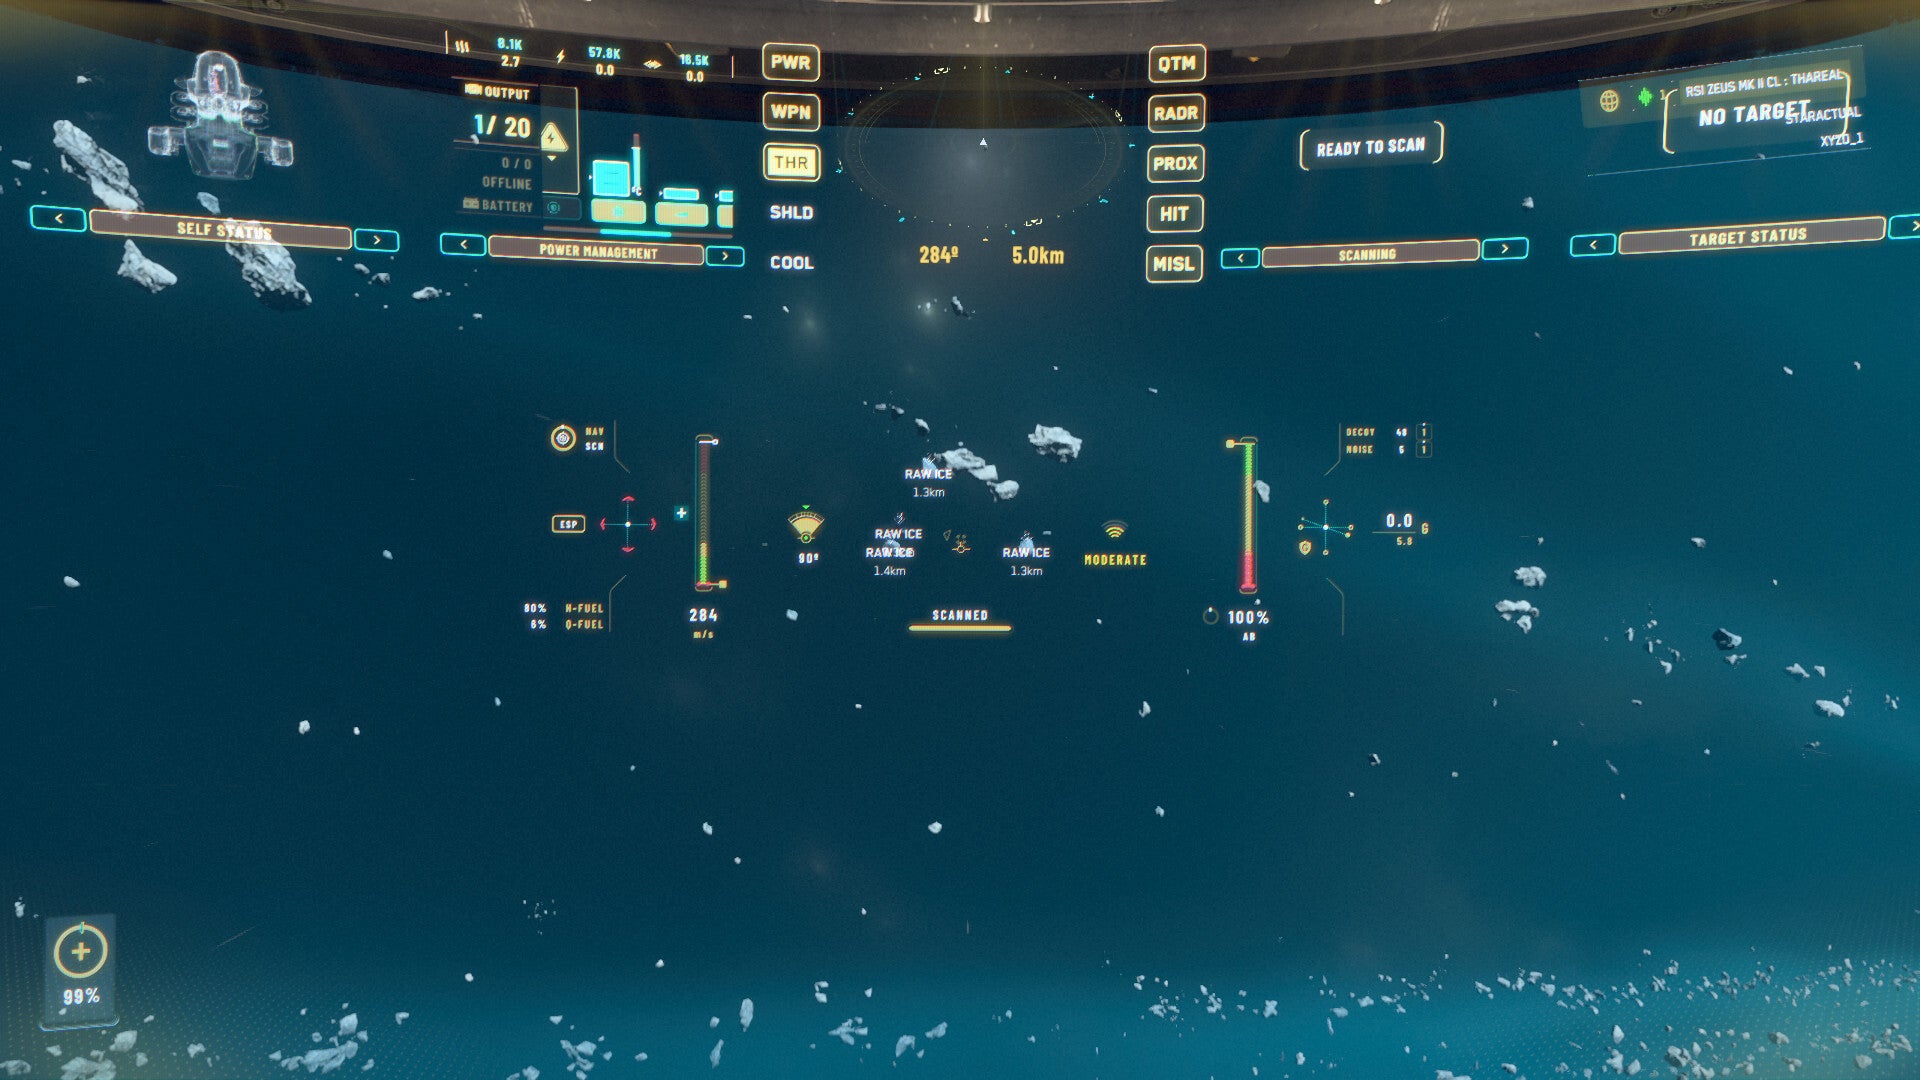
A ship must be in Space Combat and Maneuvering mode Scan (SCM-SCAN) or Navegation-SCAN (NAV-SCAN) to report data on points of interest while flying. By pressing TAB in these modes, a scan pulse is sent out and scan data is received. Scan angle can be set using your mouse wheel, with 90 degrees being the widest and 2 degrees being the smallest scan angles. If signal sources overlap, scan data can be muddled and hard-to-read. Lowering scan angle and placing your cursor on the signal will focus the signal report and give readings as Thermal, Cross-Sectional, Electromagnetic (EM), and Size.
Screening Signals
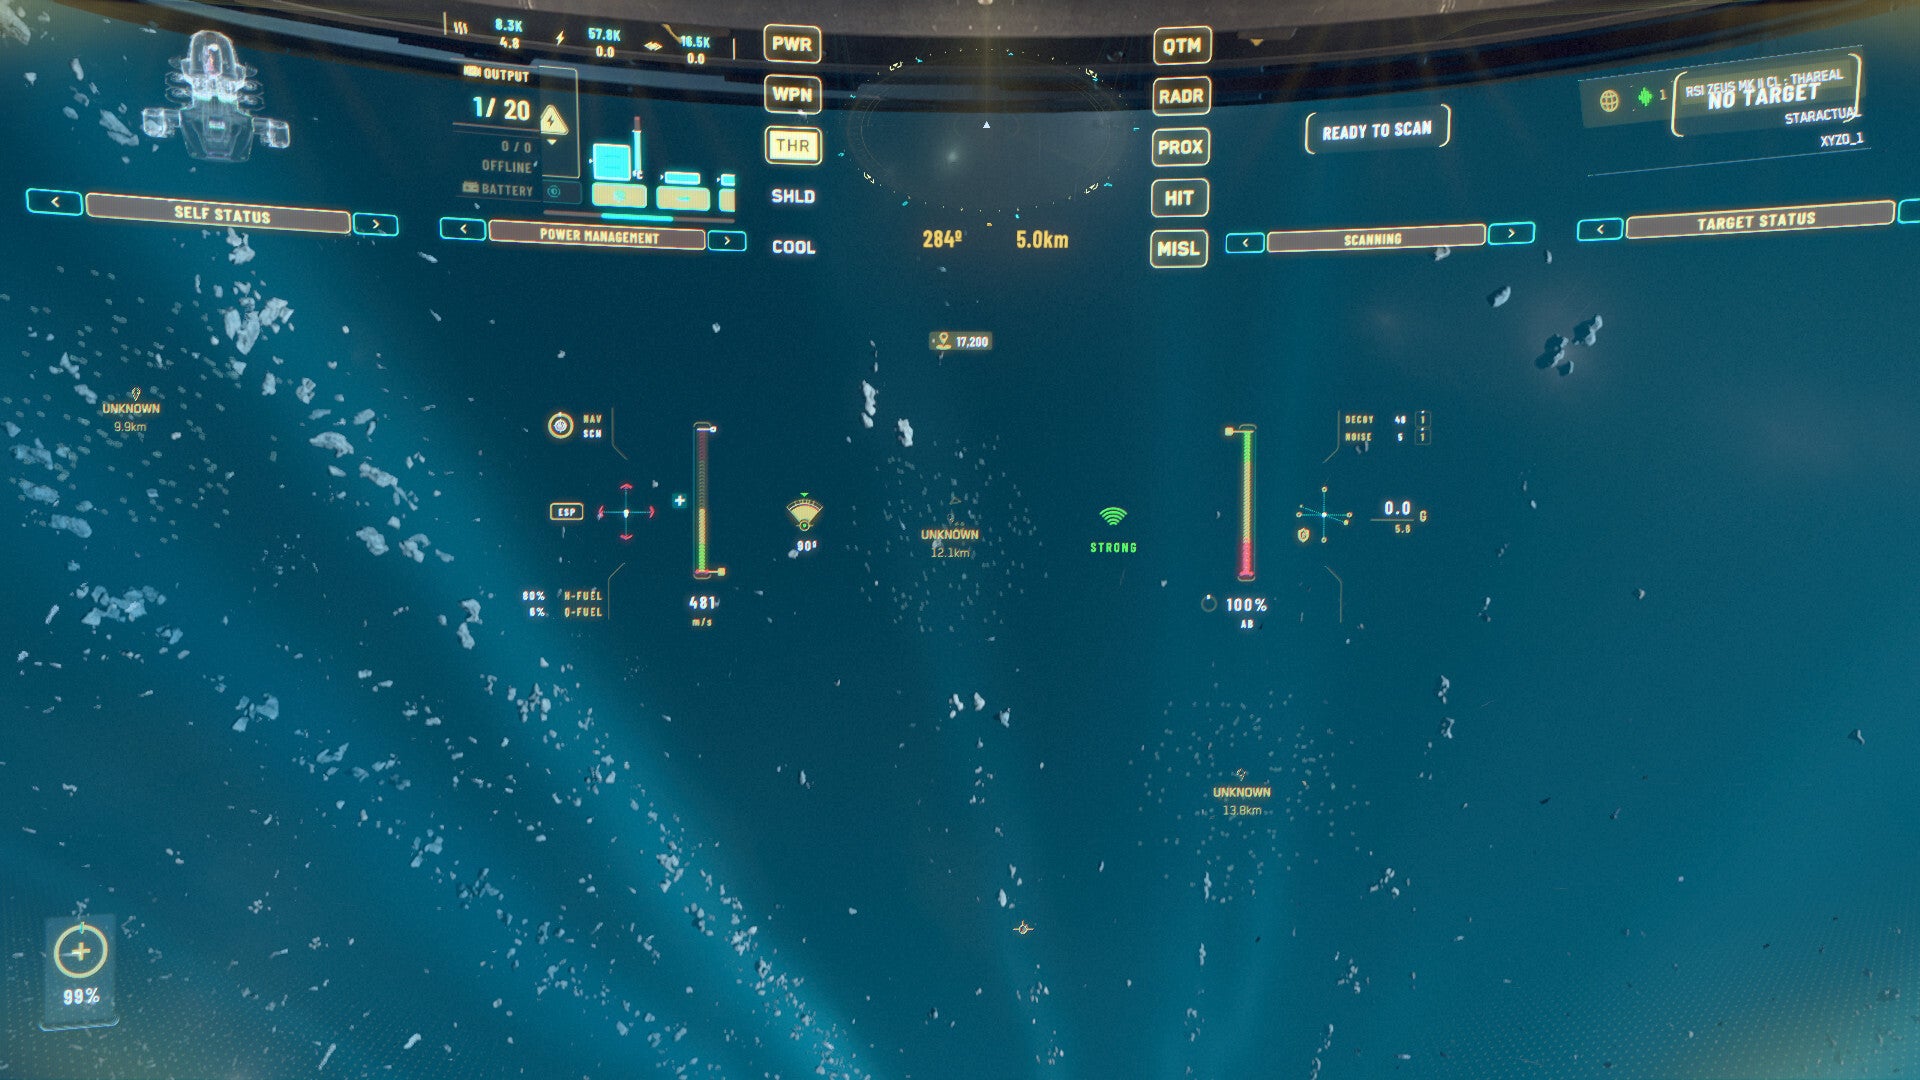
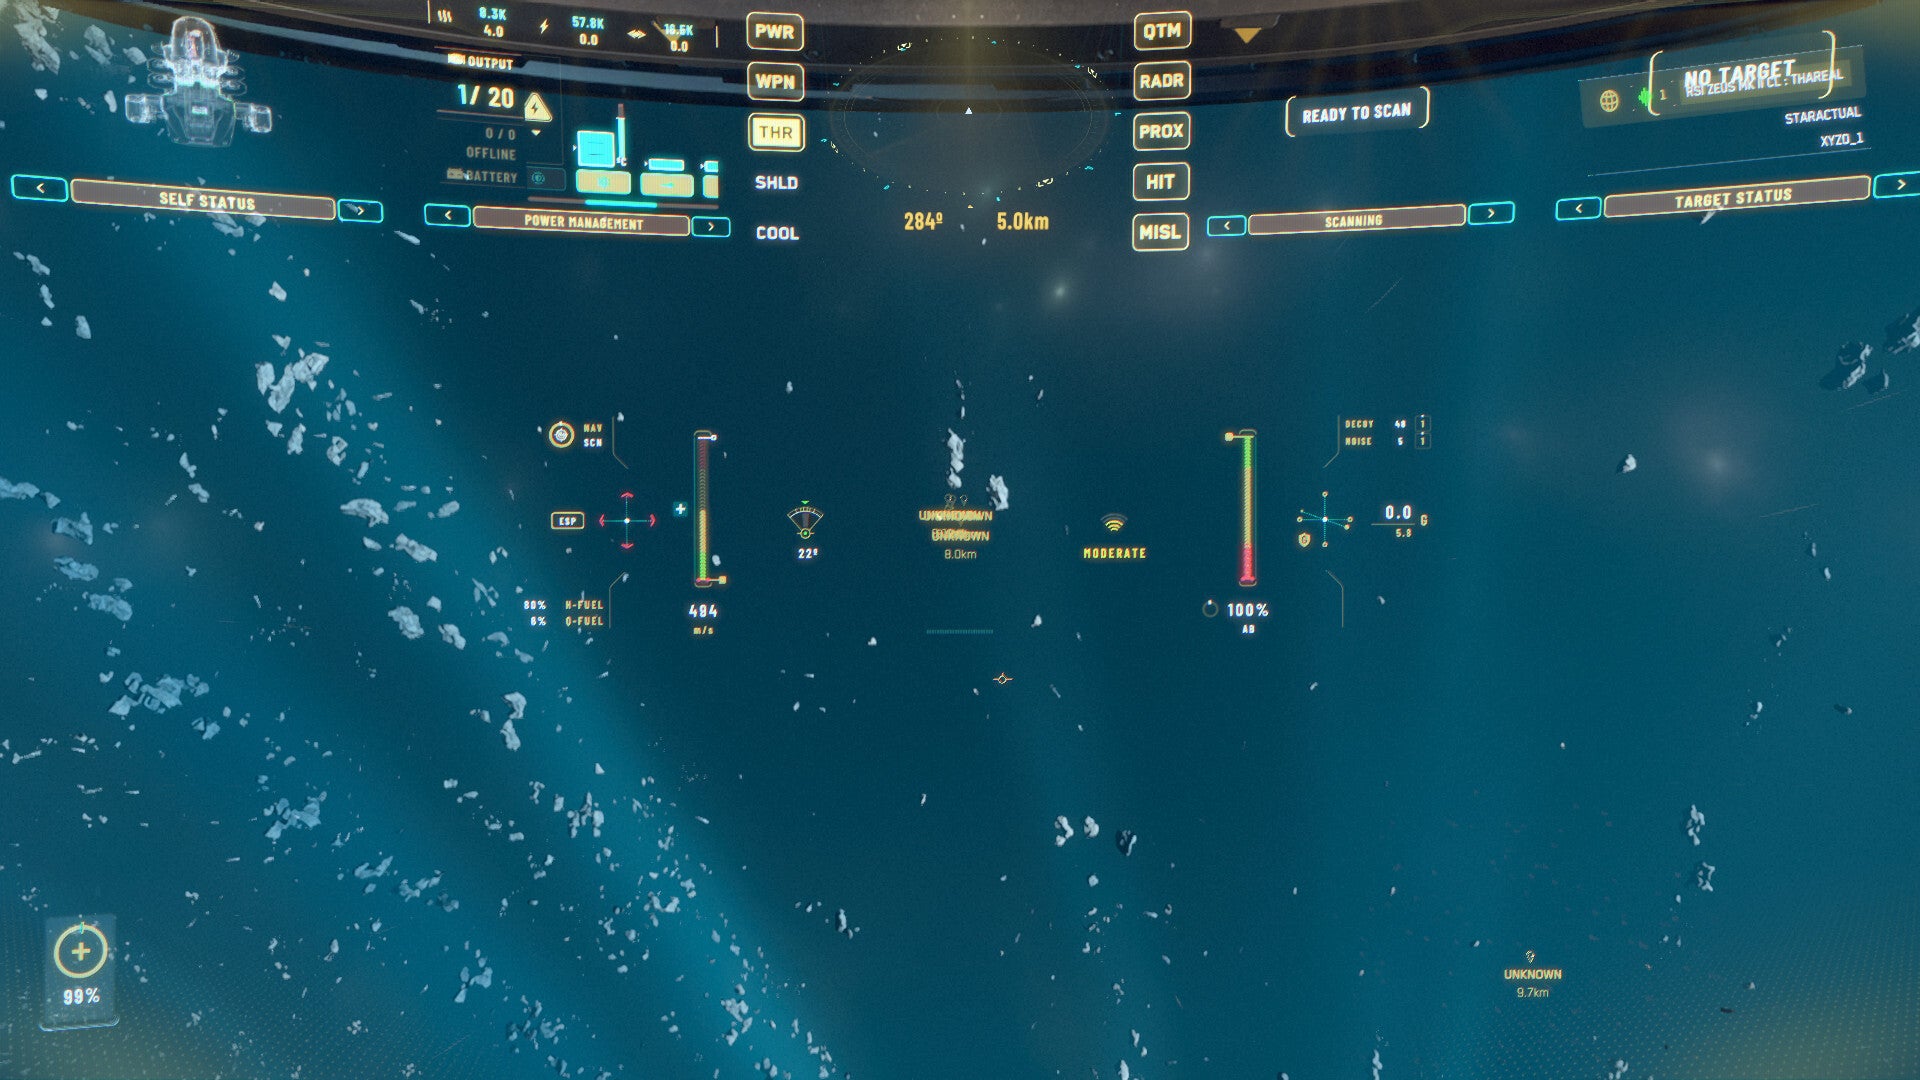
If a signal source has anything other than a "Size" return, you are scanning some man made object in space, usually another ship. In the three-part example below, a signal source is located at 12.1 km with a Size return of 17,200. Using SCMDB and knowing we are in the Nyx inner ring, this signal has to be only those found at this location. Those are Debris, Raw Ice, Iron, Torite, Bexalite, Lindinium, or Savrilium. Since SCMDB also tells you size return per signal, and a slightly zoomed in scan reveals there to be four distinct signals, in image two, this cannot be Lindinium or Savrilium, as those only spawn in clusters of one or two. From there if you divide signal strength by number of distinct signals you have 17,200/4 = 4,300 per signal. Since Raw Ice has a signal size of 4,300 this must be Raw Ice, shown in image three.
Finding a Signal
Zooming In
Ice is Revealed
Mining
Mining is the process of leveraging a ship and its mining laser to break apart and extract ores from a deposit. It comes with several hazards and best practices. To enter mining mode press "M" on your keyboard in either SCM or NAV mode. This will extend your mining laser and bring up the mining UI.
Place your Mining Gadget
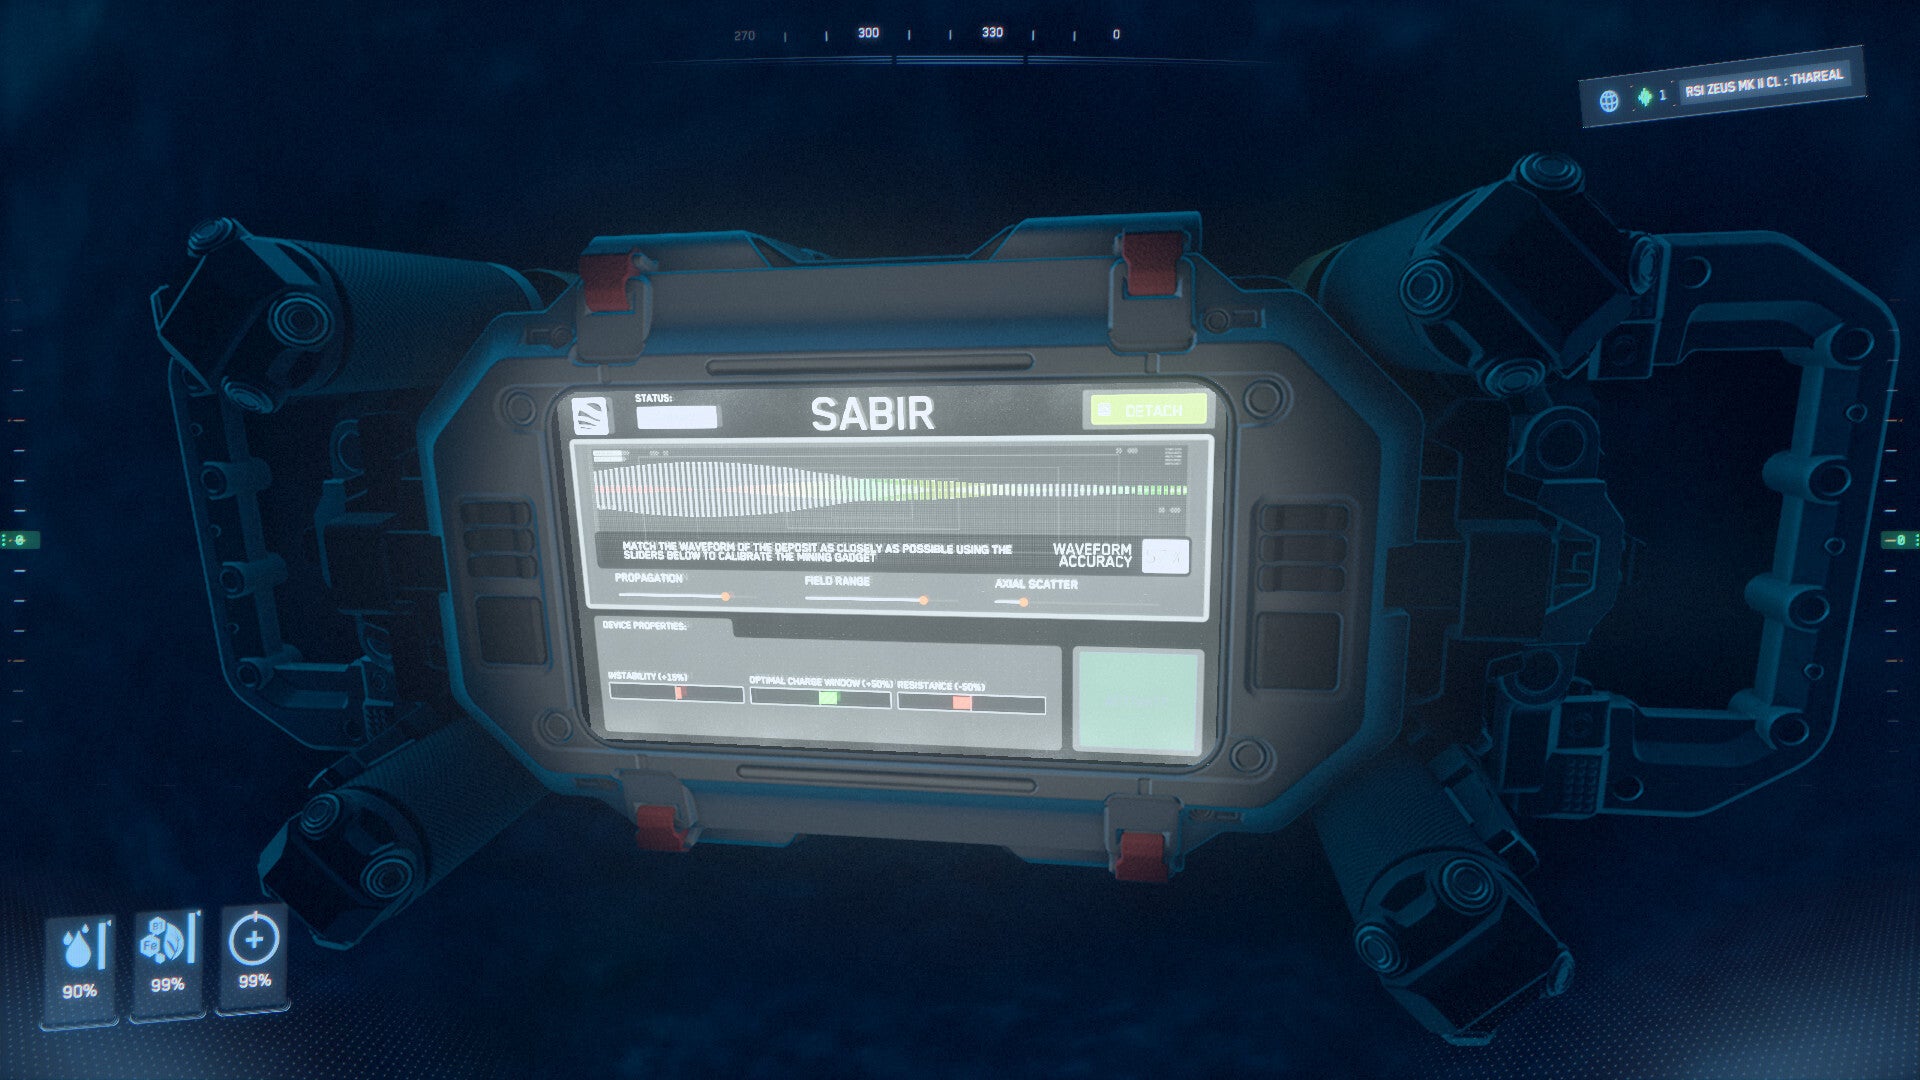
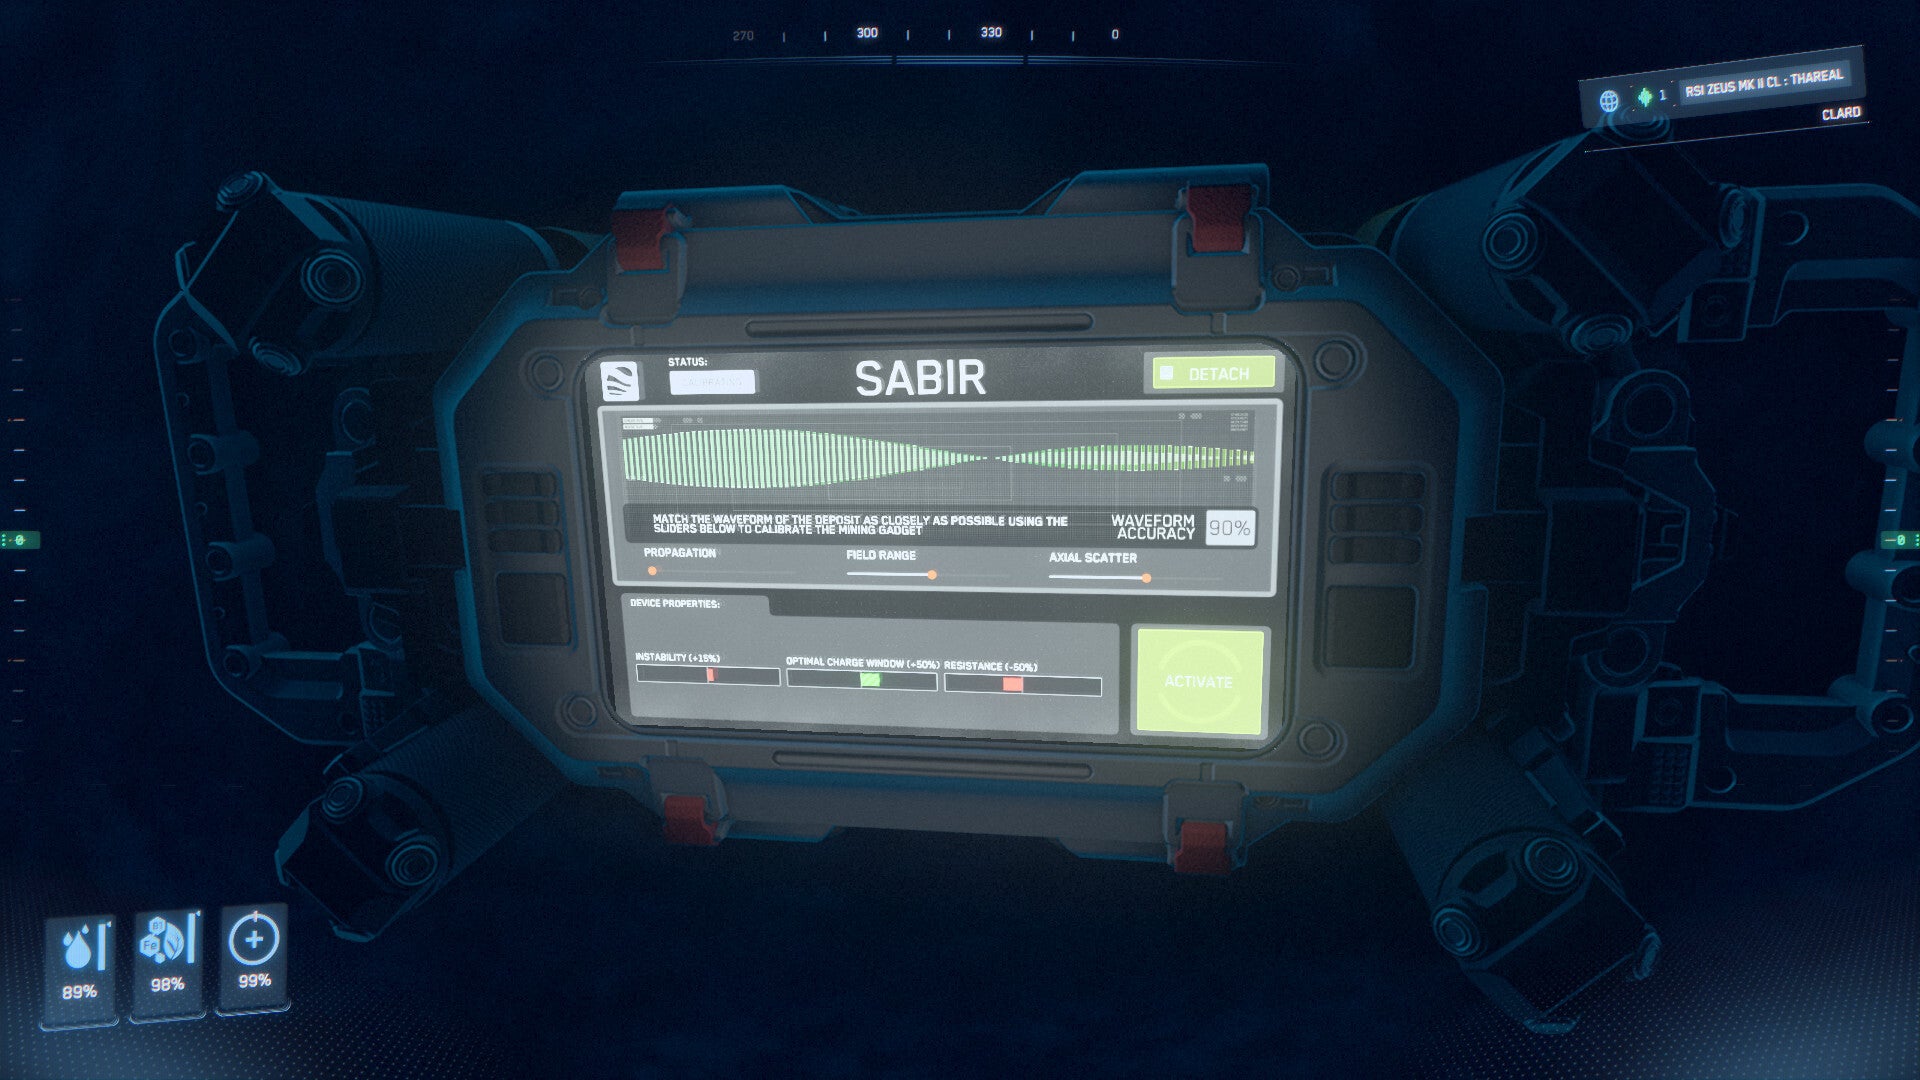
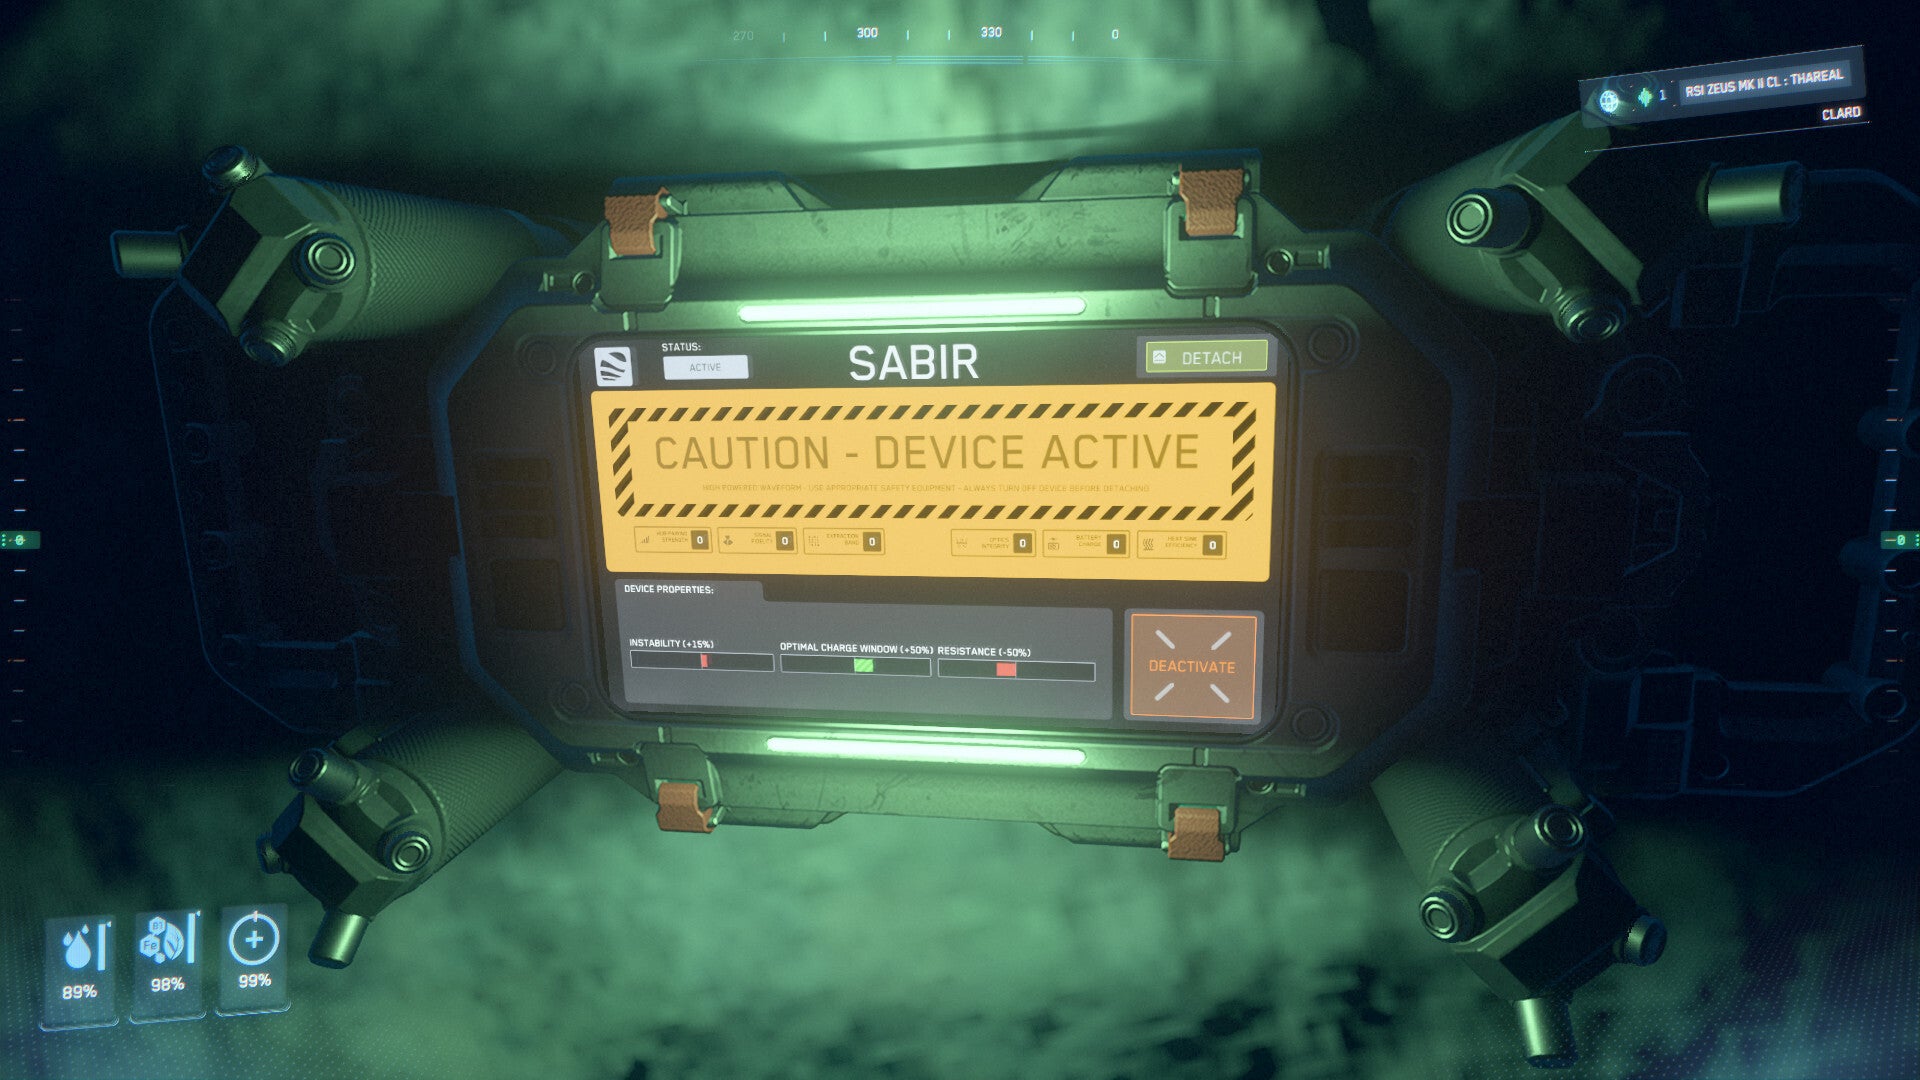
Mining gadgets apply various bonuses to a deposit. Most importantly they are the only source of "Cluster Modifier" changes. To place a gadget, equip it to your character the way you would a weapon or medipen or right click it from your backpack and select "Equip." With the Gadget in hand, EVA up to the rock and hold left click to view the placement hologram. When you like the placement location, release left click to place. Once Placed you must tune the waveform of the deposit, gray waveform, to the waveform of the device, colored waveform, until they match 90% or greater. Use F interaction to slide the Propagation, Field Range, and Axial Scatter sliders until the waveforms match. Propagation adjusts the left-to-right shape of the wave. Field Range adjusts the absolute maxima and minima of the waveform. Axial Scatter adjusts the slope between maxima and minima. Once matched use F interaction and click Activate. If done correctly the gadget's symbol, found in the top left of is UI, will appear on the deposit when viewed from mining mode aboard the ship.
Gadget Placed
Gadget Tuned
Gadget Activated
The UI
Starting on the left of the mining reticle is Distance and Mods. With your cursor above the deposit you wish to address, this reports the distance to deposit, your laser's optimal range, and the shatter-damage distance of the deposit. Just outside of the reticle arc your currently equipped mods and their effects are also reported.
On the right of the mining reticle is Power Level and detailed Scan Results. Power level reports current laser throttle, energy level, optimal cracking window, and overcharge energy window for the deposit. Scan Results reports mass, resistance, instability, relative difficulty, and composition by ore quality and percent.
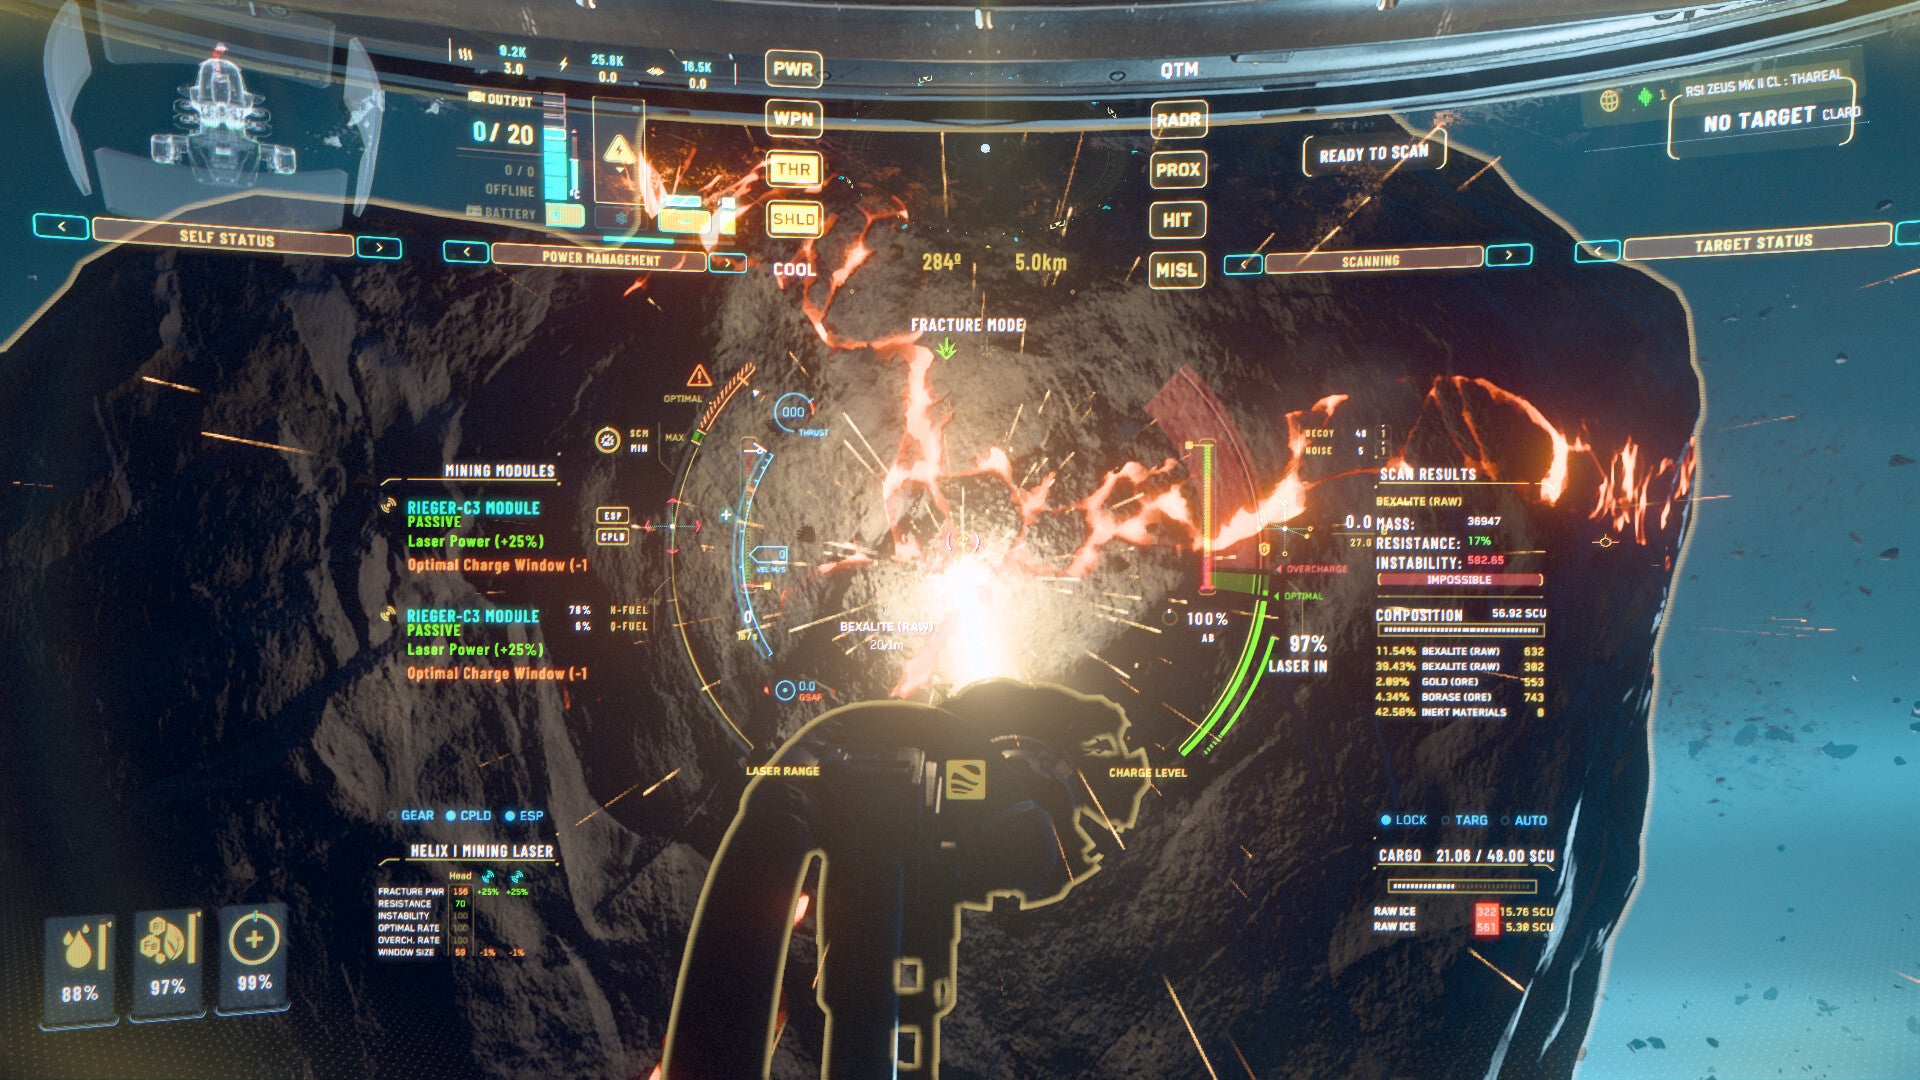
Cracking
Cracking is the process of breaking a rock into smaller harvestable chunks is the majority skilled portion of the mining and refining process and constitutes the major share of actual gameplay. To crack a deposit approach until your Distance Reticle reports you are within acceptable range to begin the process. If your laser power is considerably more than is required, you should increase distance from optimal. If your laser power is less than is required but pretty close, it is possible to exchange more instability and safe distance for a minor increase in power by decreasing distance. Left click to turn on your mining laser and use mouse-wheel to change throttle, the percentage of your full power being used. When the green bar in the power level reticle begins to move, you have begun charging the rock. The goal is to manage power level to keep the charge bar in the Optimal Window until it fills completely while avoiding overcharging the deposit. Upon successfully doing so, the deposit will break apart into either sub-crack deposits (orange outlined) or harvestable deposits.
Extracting
While still in mining mode, alt-left clicking will switch the laser to extraction mode. The Power Level UI will be switched for an extraction rate and cargo currently aboard UI. After scanning the harvestable chunks (purple outlined) and choosing to harvest, left click to begin the short process of storing the ore aboard your ship.
Best Practices
- As you charge a deposit you will notice fissures begin to form. If you place your laser on a fissure the power level response will become more leveled and controllable. The more fissures that collect at any given point under the laser the more noticeable this effect will become.
- Find the zero-point. If you can charge a deposit at all, then there is some balance between laser throttle and distance where the charge level neither falls nor increases. If you can find this point, it becomes trivially easy to crack any deposit, no matter how thin the Optimal Window is.
- Pick up any mining gadgets immediately following a crack. If a mining gadget is still attached when a deposit is harvested, it will be destroyed.
- Harvest from as low an "Inert Material" content deposits as you can. Installing FTLR Mods does reduce the amount of waste rock picked up, but it is best to harvest from as-close-to-pure deposits as possible. You only have so much space in your cargo, try not to fill it with Inert Material.
- Never mine with your shields down. This requires that you perform cracking operations in SCM mode with power assigned to your ship's shield generators. Shields have marginal increase in resistance to explosion damage as compared to raw hulls, and even if a deposit is not overcharged, some explosion damage is still dealt. To avoid a costly repair bill and to survive in event of an overcharge, ensure your shields are powered.
- In the same vein as keeping your shields charged, thrust back just as a crack is finishing. Shields mitigate damage, often absorbing it completely. In the event that a given deposit imparts more explosion damage than others, if you quickly increase distance to a deposit as the crack finishes, you will avoid the damage entirely instead of only relying on your shields.
Hazards
There are two main hazards while mining. Overcharge and Crashing.
Crashing is obvious, but worth mentioning. Mining ships are rugged but not particularly durable, and cockpits are the lowest health pool sub component on any ship. Since a miner is often pointing his/her cockpit directly at the deposit, it is easy to apply too much thrust while maneuvering and bump it. These bumps can lead to ship death.
Overcharge is the primary hazard. The red overcharge window on the Power Level UI will begin to fill if deposit charge level is too high. As it fills, the damage amount and area of effect of finishing the crack increases exponentially with the level of overcharge. A small amount of overcharge will not kill you or your ship. However, any more than a quarter and you are in serious danger of catastrophic detonation. Best to back off, let the deposit cool down, and try again.
Refining
Refining is the process of depositing ore at a station so it can be turned into material useful for selling and crafting. Refining can be done at most major stations, for a complete list reference UEX.
Refinery Bonuses
All refineries have increases or decreases to any of the ore types found in-verse. Some of these are as high as 10%. To get more out of the effort you already put into extracting the resources, it is best to find a refinery which will increase your yields after refinement. The UEX link above has a list of these bonuses.
Picking a Method
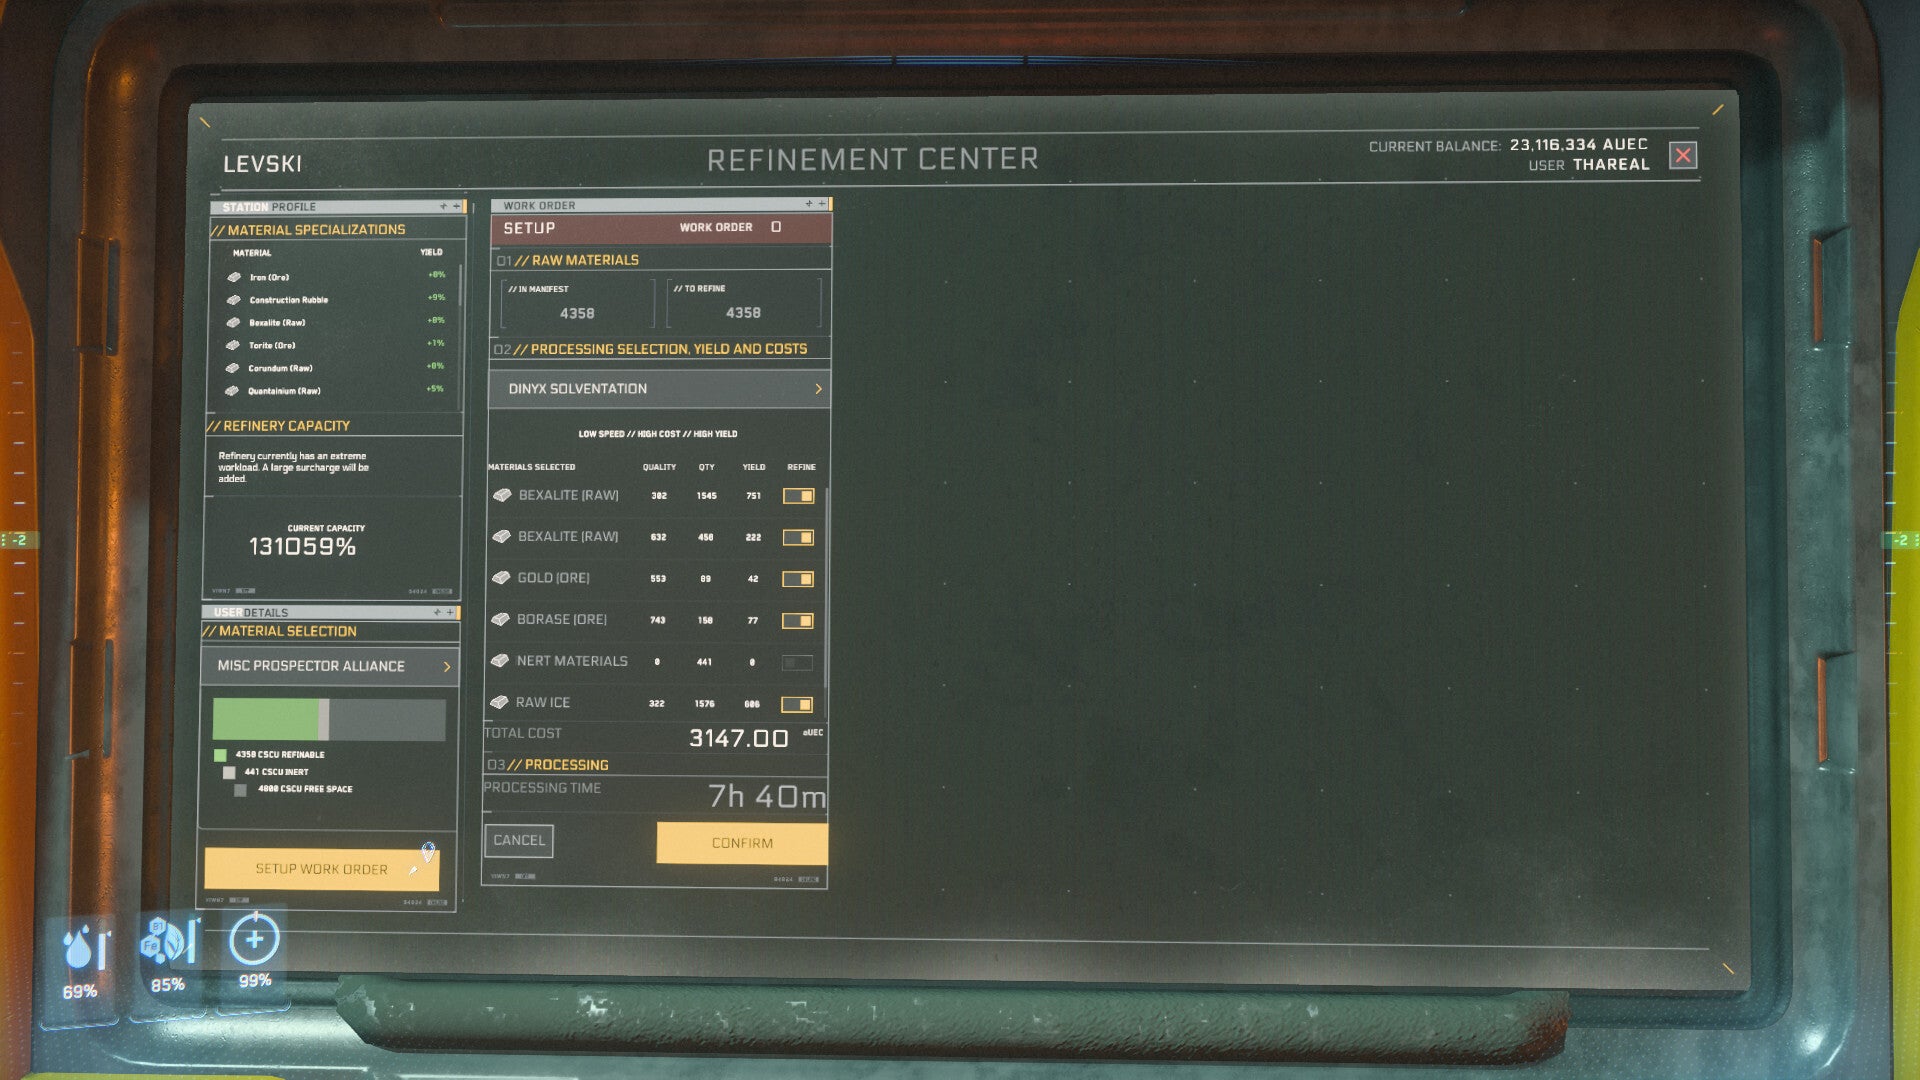
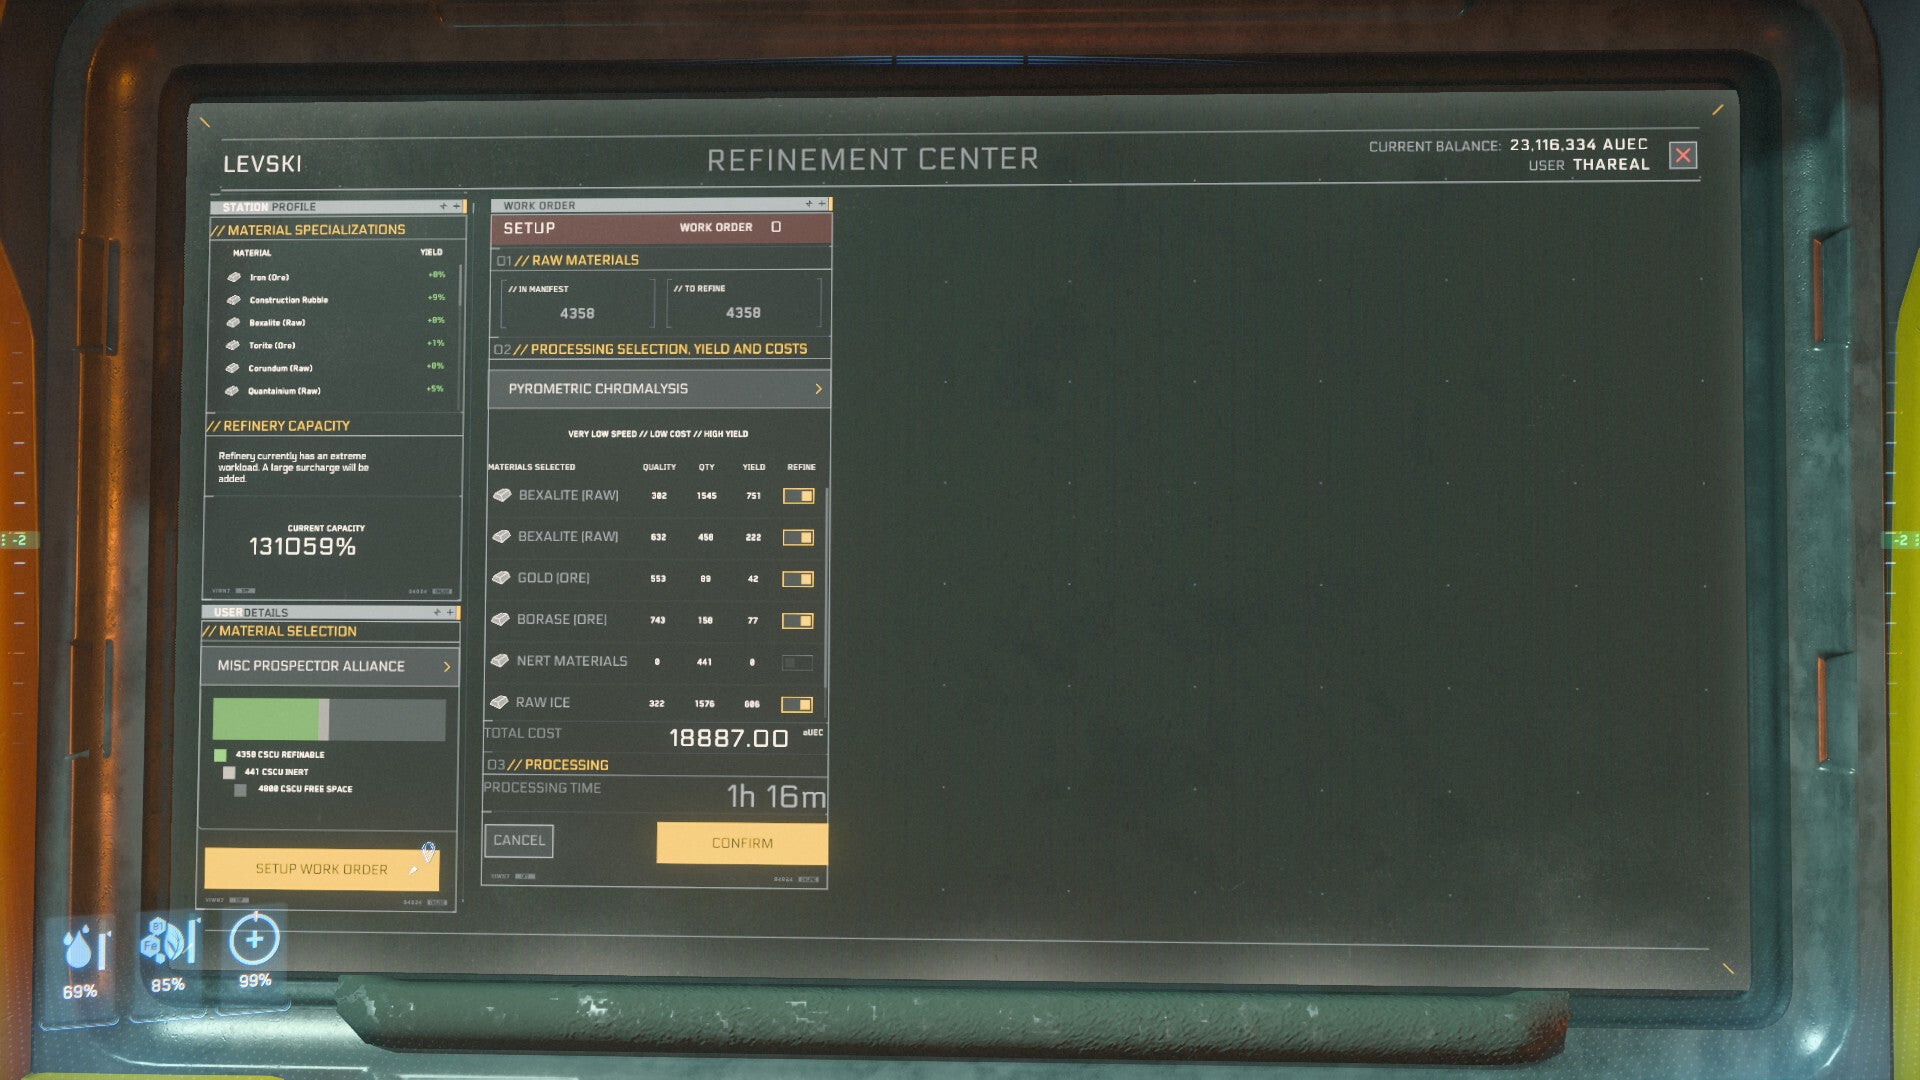
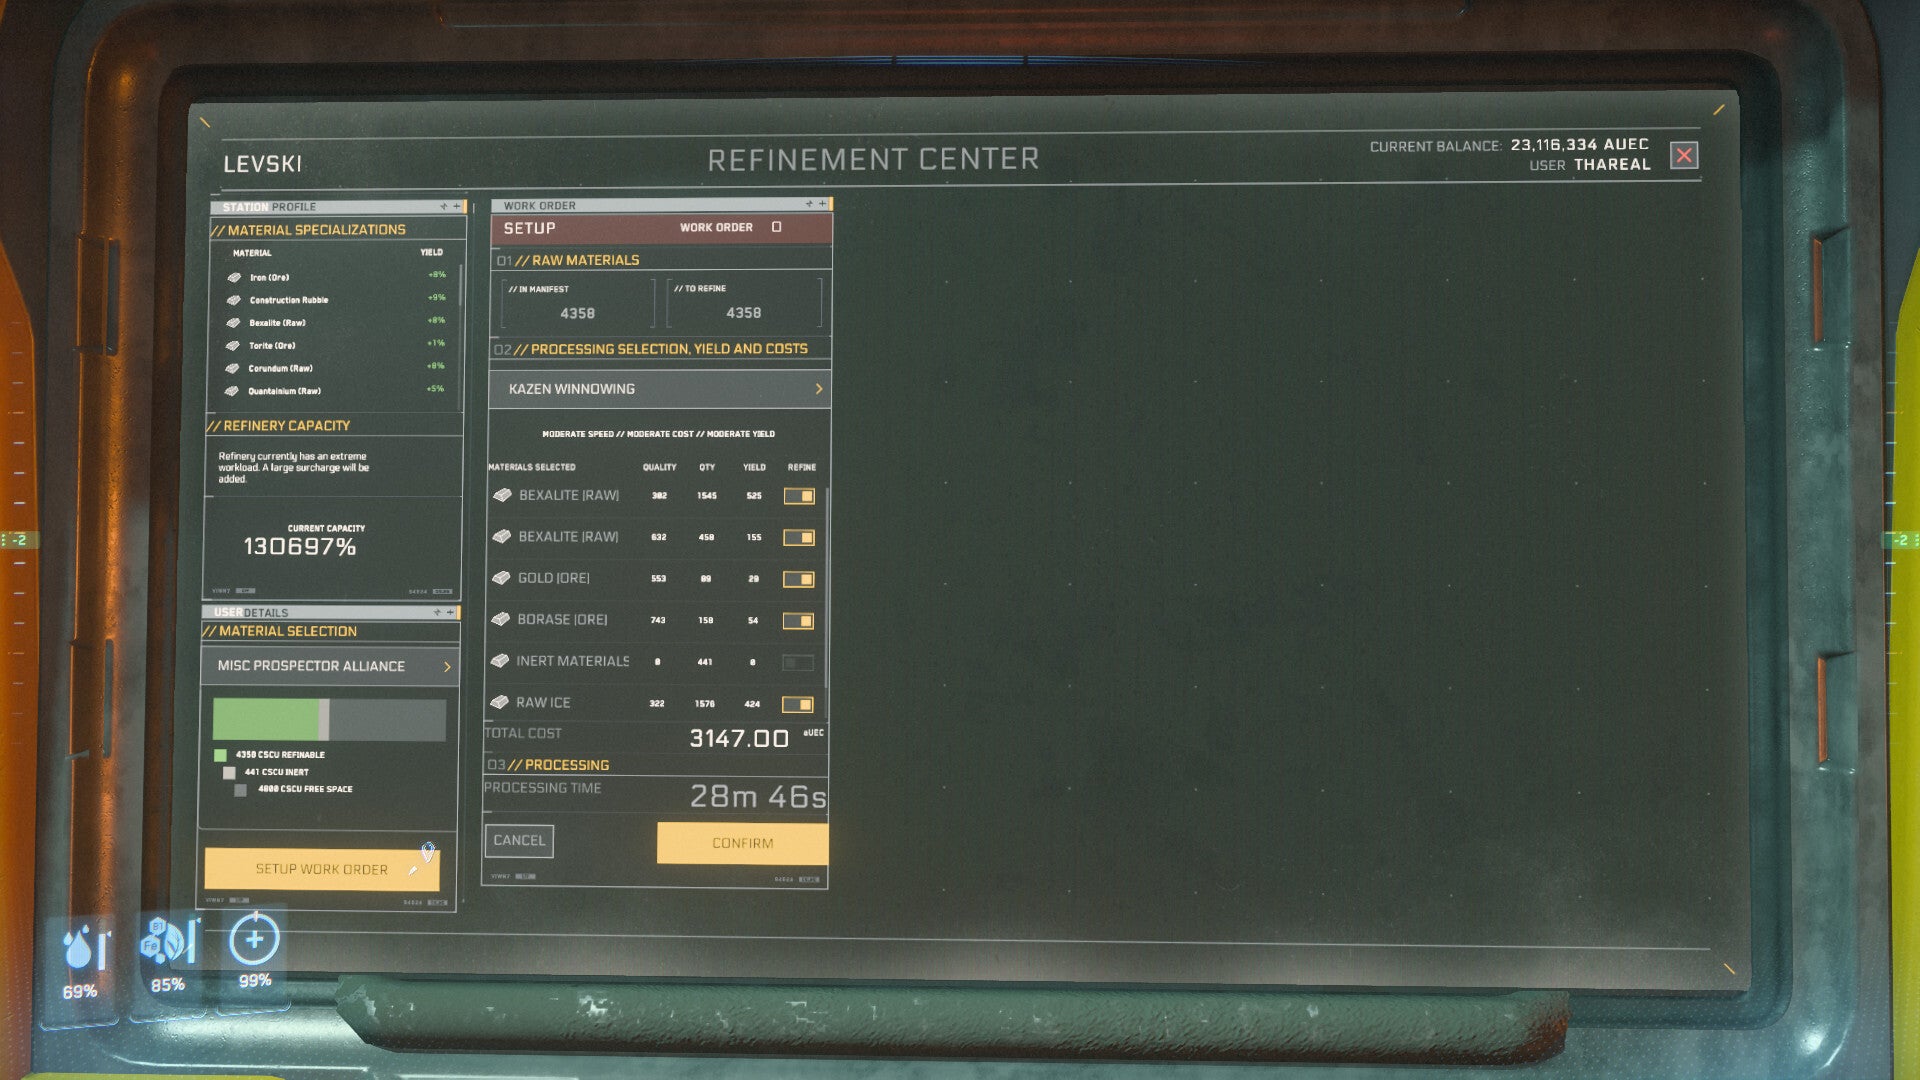
When you arrive at the refinery terminal at your chosen refinery deck you will be prompted to create a work-order to refine your goods. In this work order you can choose to abandon some components of the collected ores to lower the time and cost of refining. Refining can take as little as a handful of minutes to as long as a few days, likewise it can return as high as approximately half of your ore as usable material, or as little as a tenth. The method is entirely up to you. As you browse the refinery methods note in the top of the UI that the Speed, Cost and Yield are given generally. Crafting is done in the cSCU per item, ensure you've refined enough of the materials you need before starting a craft.
Below is an example of Speed, Cost, Yield variations for the same mining load across three of the more well used refinery methods for the same ore load.
Refining via Dynix Solventation
Refining via Pyrometric Chromalysis
Refining via Kazen Winnowing
Craft Gear
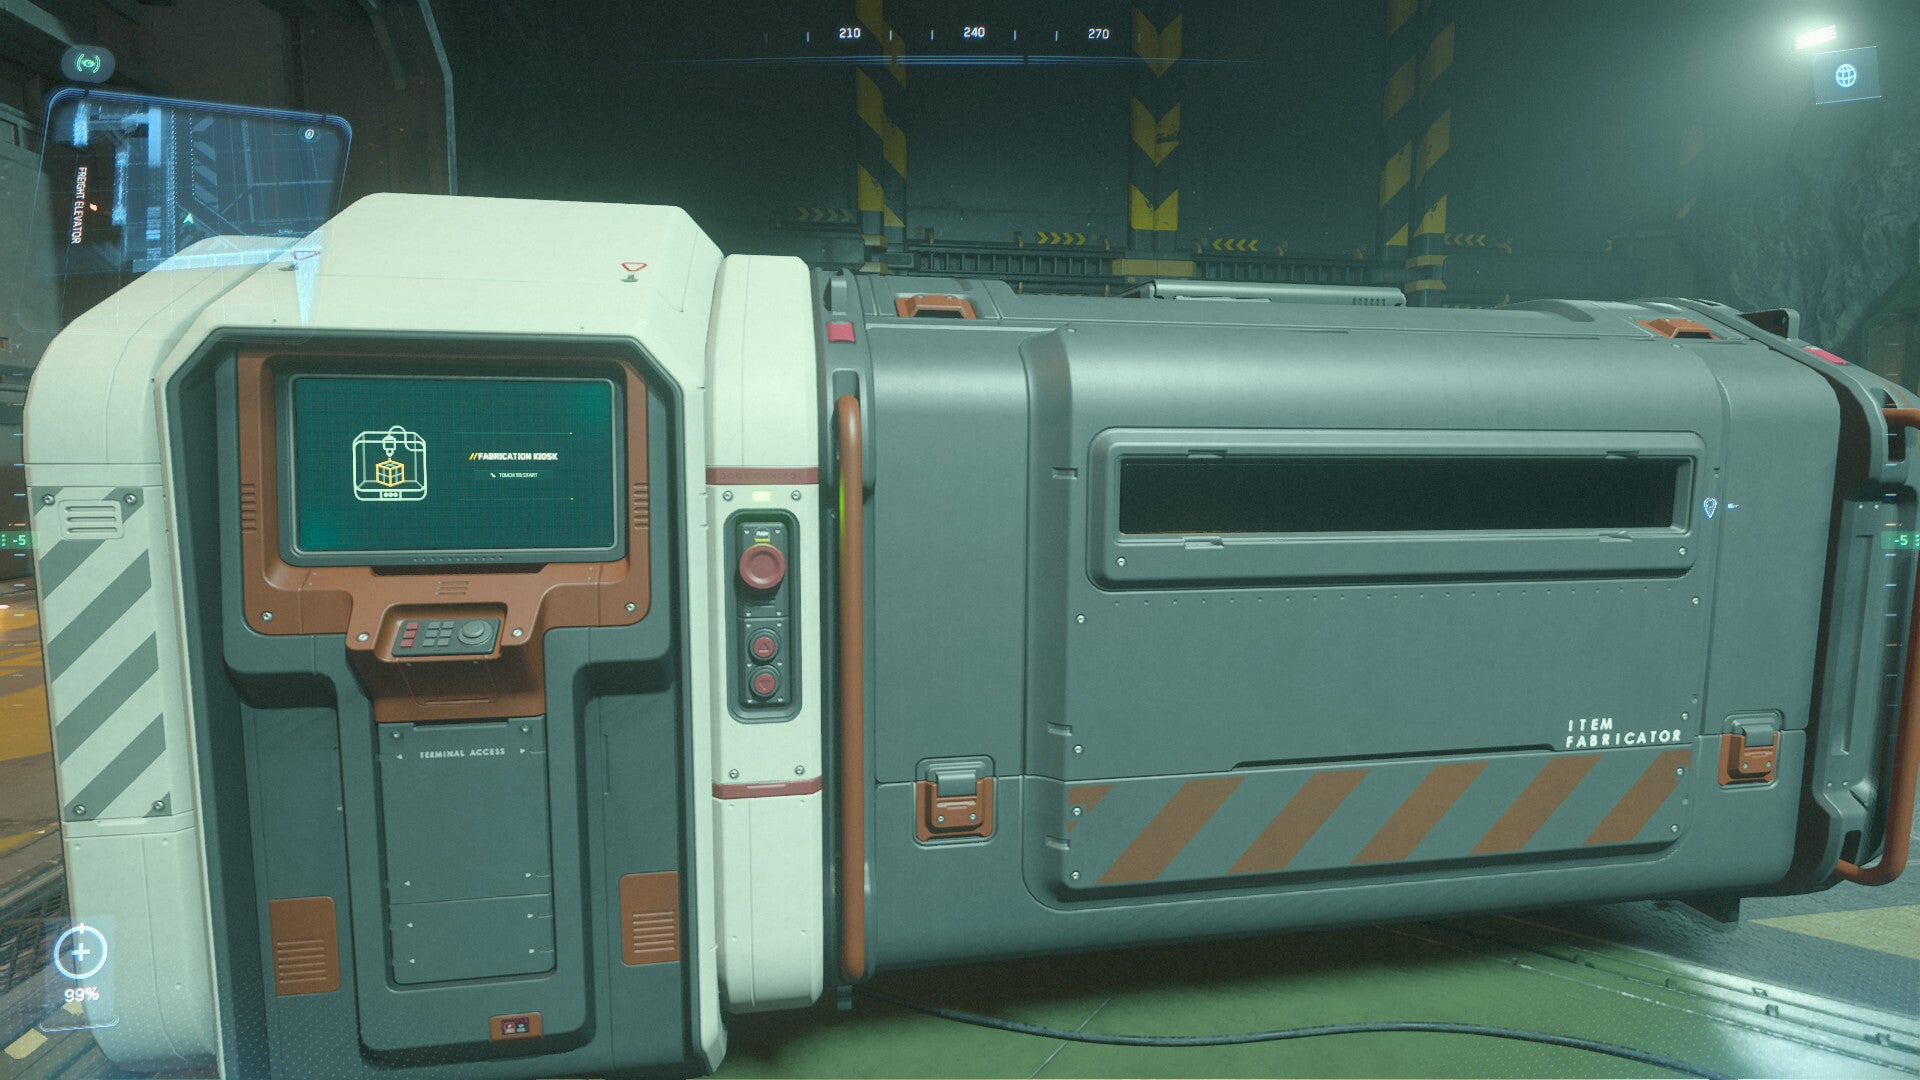
Get a Fabricator
Fabricators can be purchased at any cargo deck for 100,000 aUEC. For a complete list of locations selling them use Cstone - Universal Item Finder.
Preparing to Craft
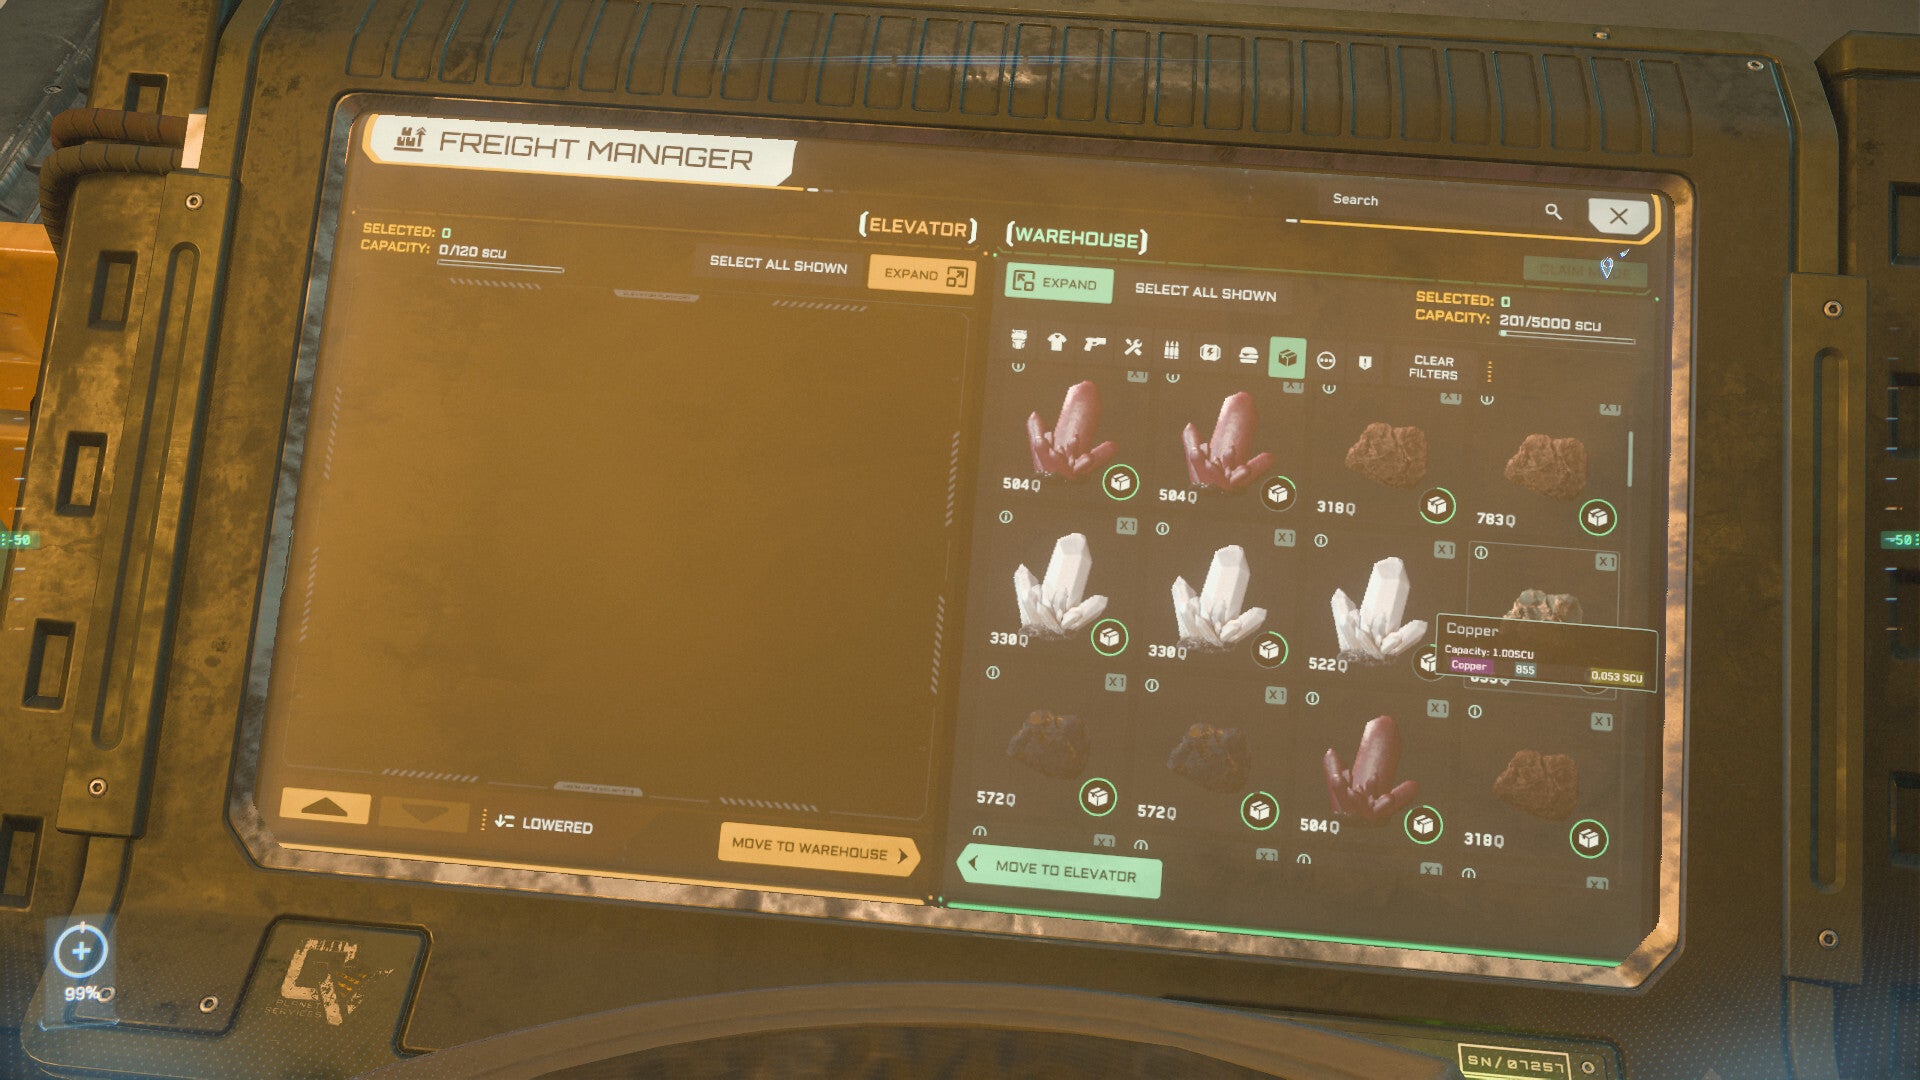
Now that you've obtained your blueprints and refined your minerals you're ready to craft. Using a cargo vessel or by virtue of having done all your refining at one refinery, collect all your materials and fabricator in the same local inventory of any given station or city. Bring your fabricator up on the cargo elevator and it will have access to any materials you have in local storage.
Crafting
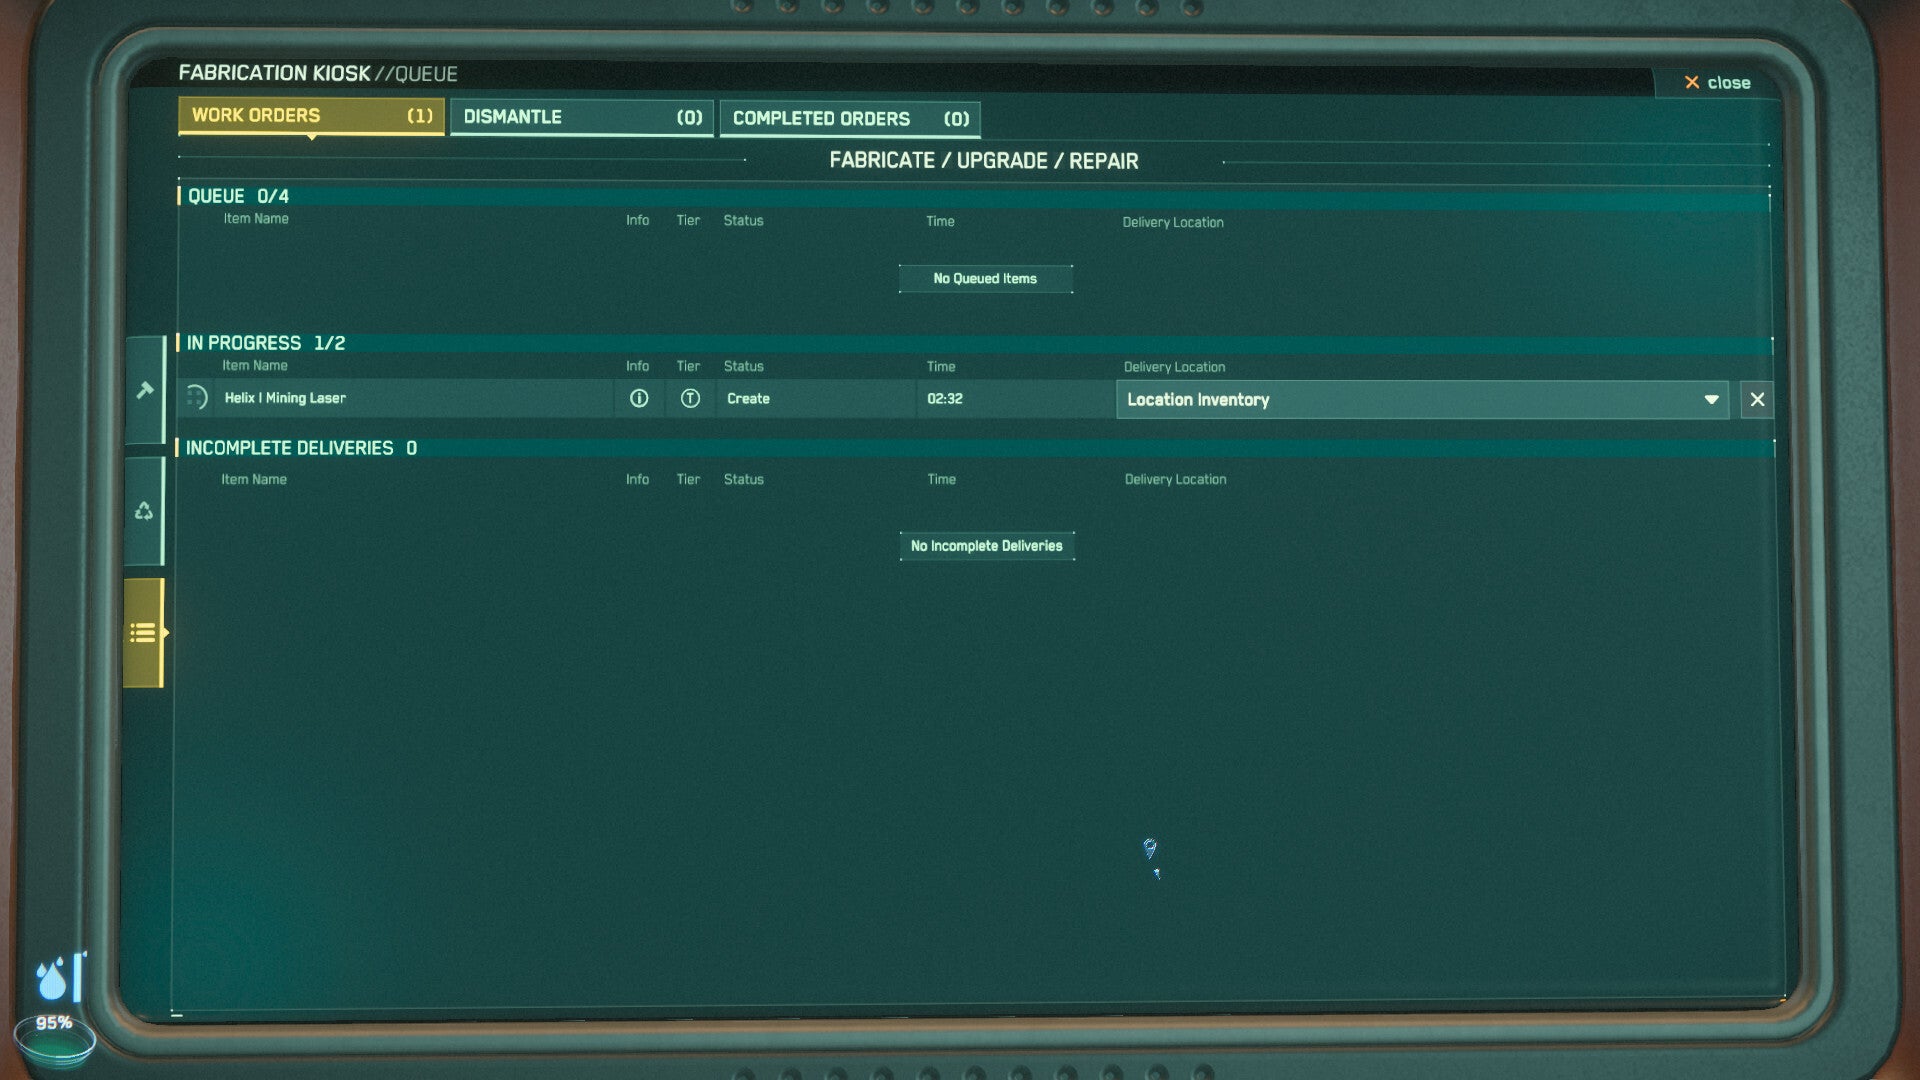
Access the crafting UI using F-interact on the MFD. It will populate with several tabs. One for Crafting, one for Dismantling, and one for Workflow. The top one, with the hammer, is for crafting. Enter this tab and all available blueprints will populate.
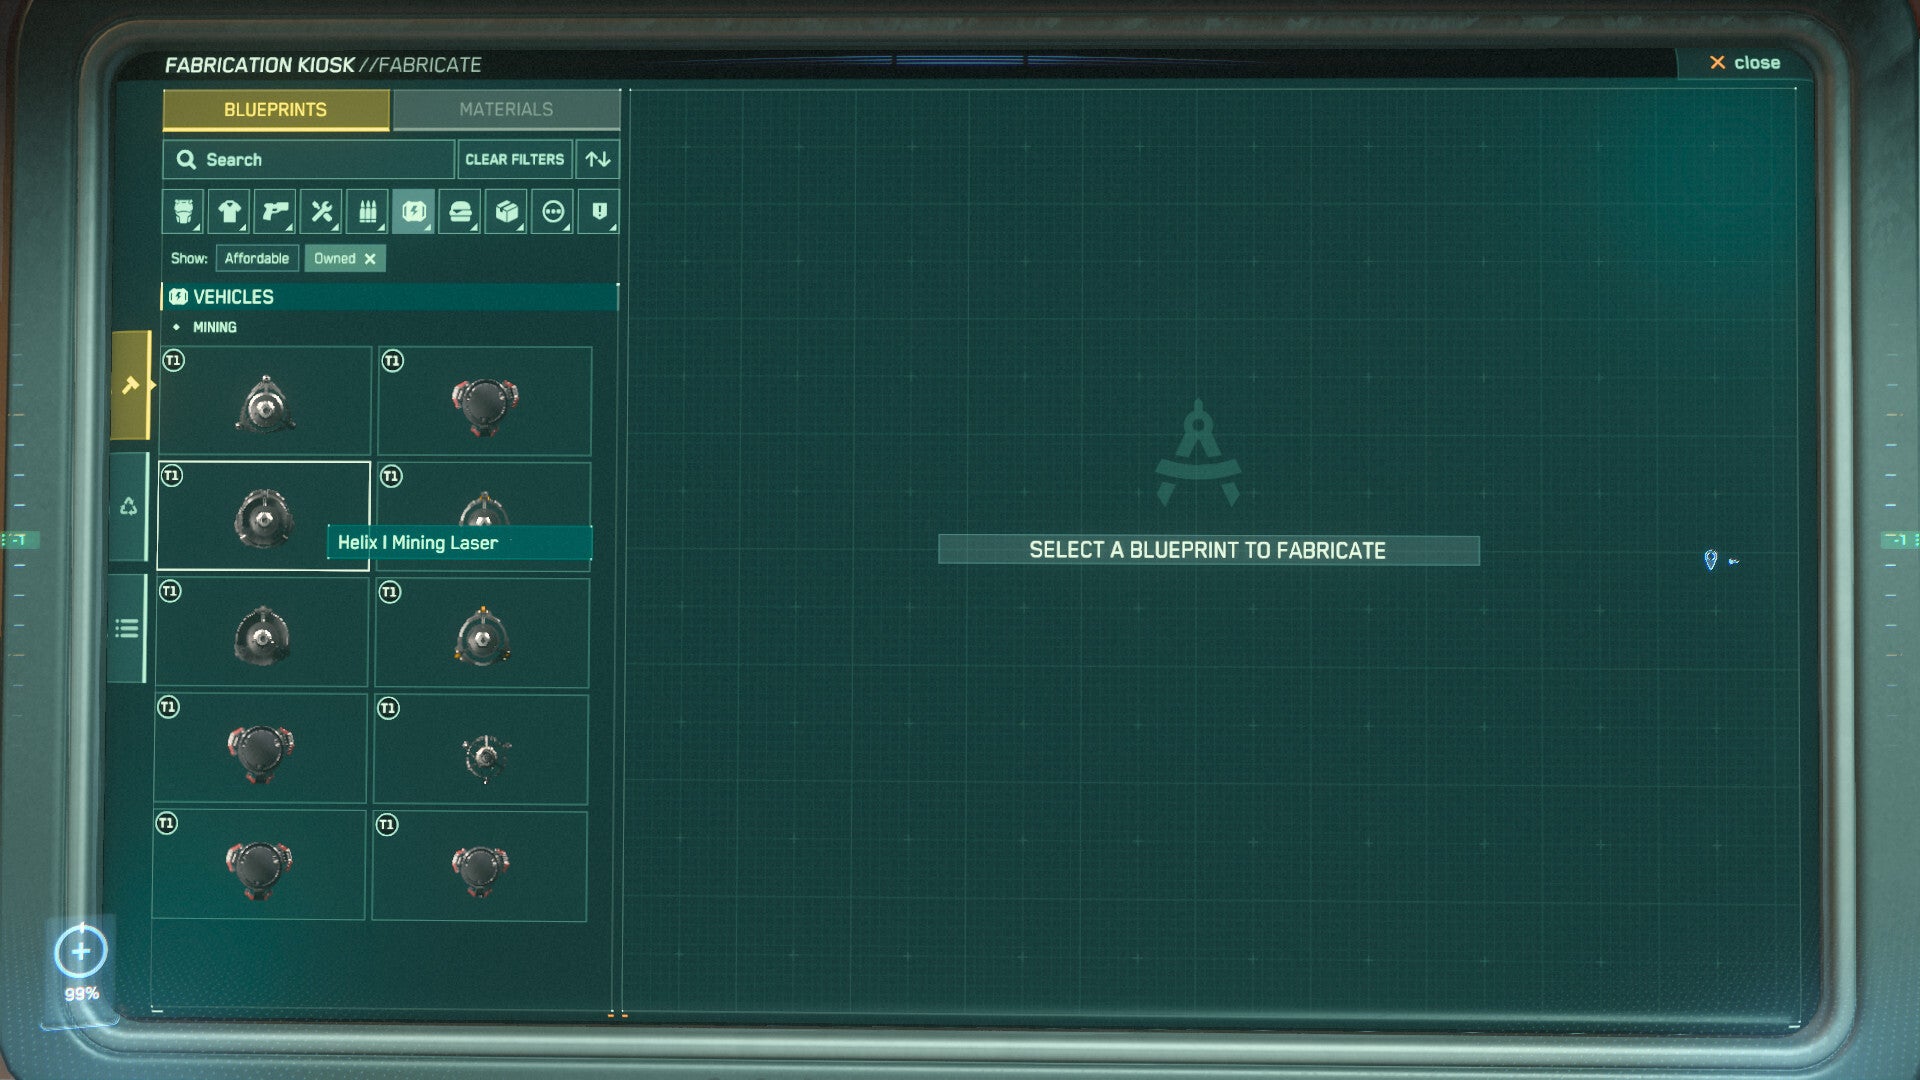
From here the standard inventory sorting filters or the search bar can be used to find exactly what it is you want to craft.
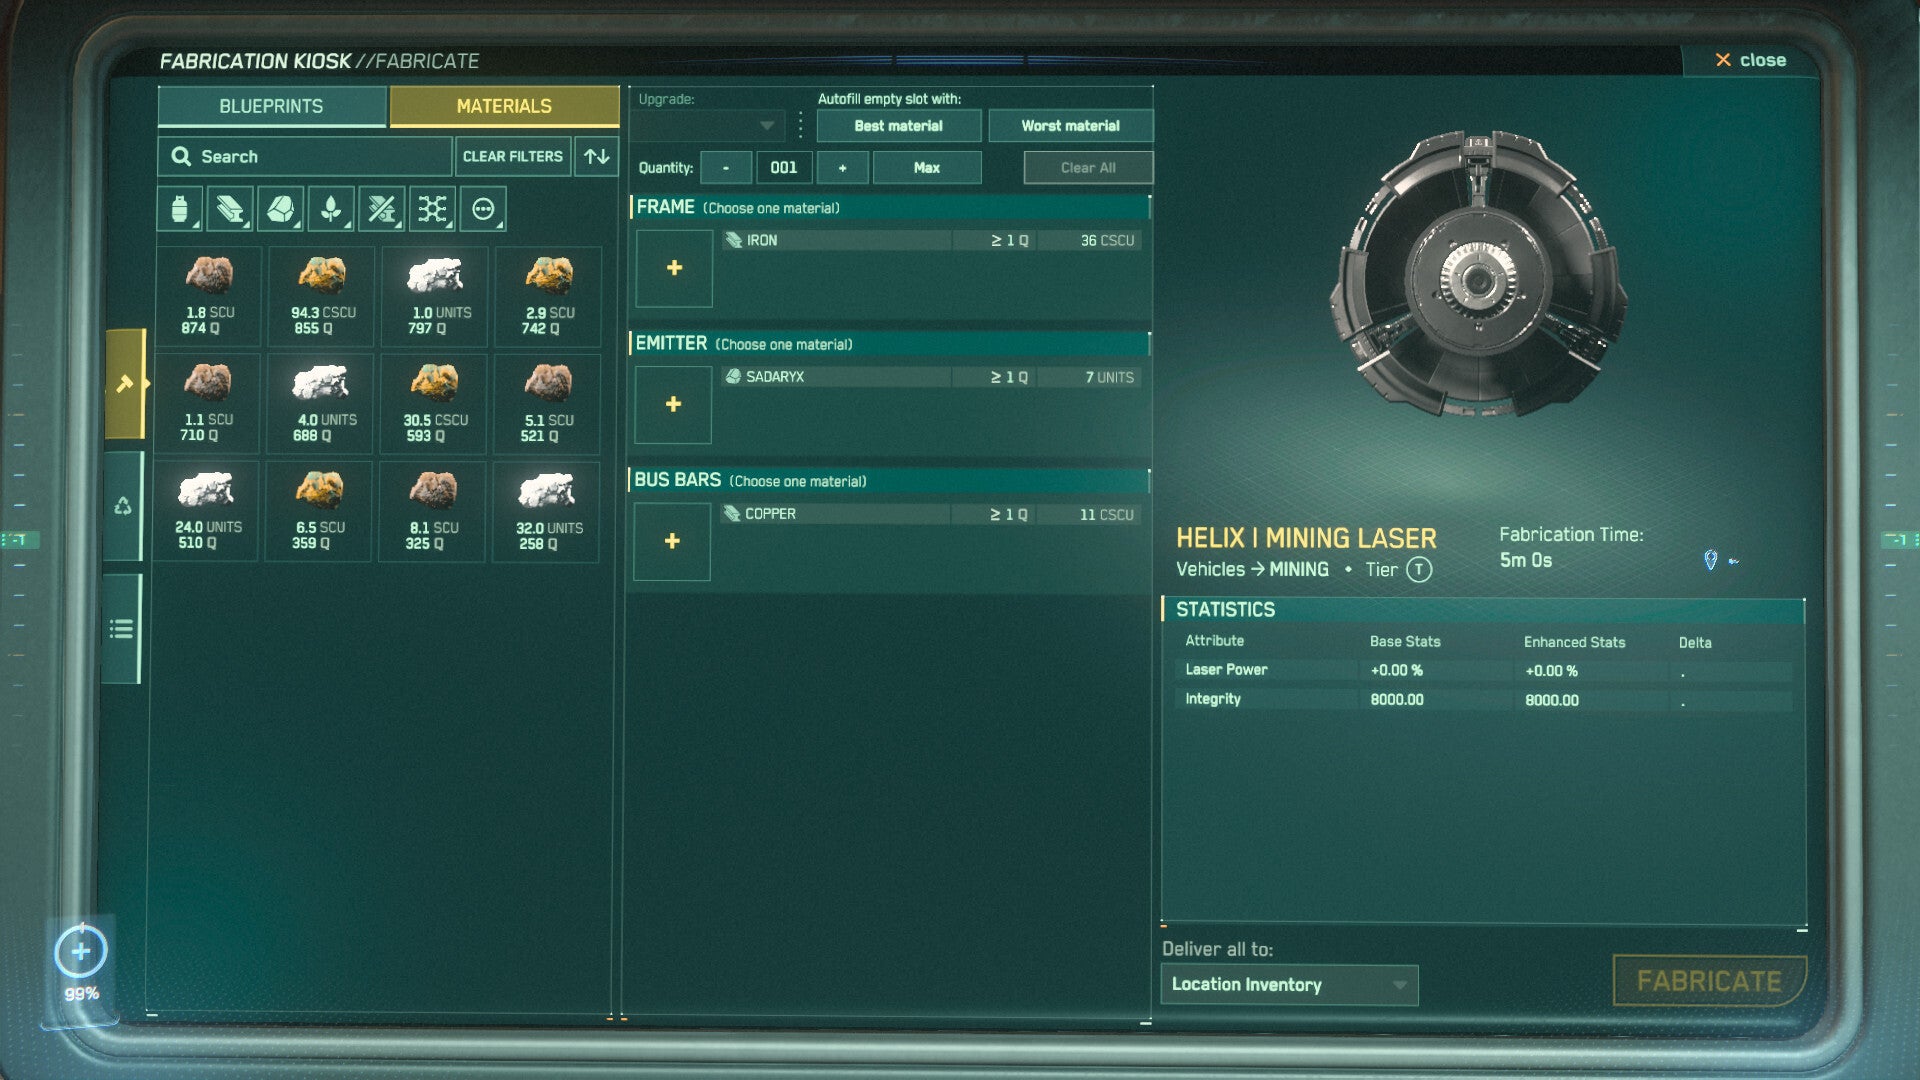
Patch 4.9 can be a bit buggy when selecting resources to fill the slots. Unless you are producing something for someone at a specific quality or a consumable, clicking "Best material" will fill out the necessary cSCU of resources required to complete the craft. This will also fill out the components with a rough average of best quality if you do not have enough of your highest quality resources. Otherwise each component must be drag and dropped individually.
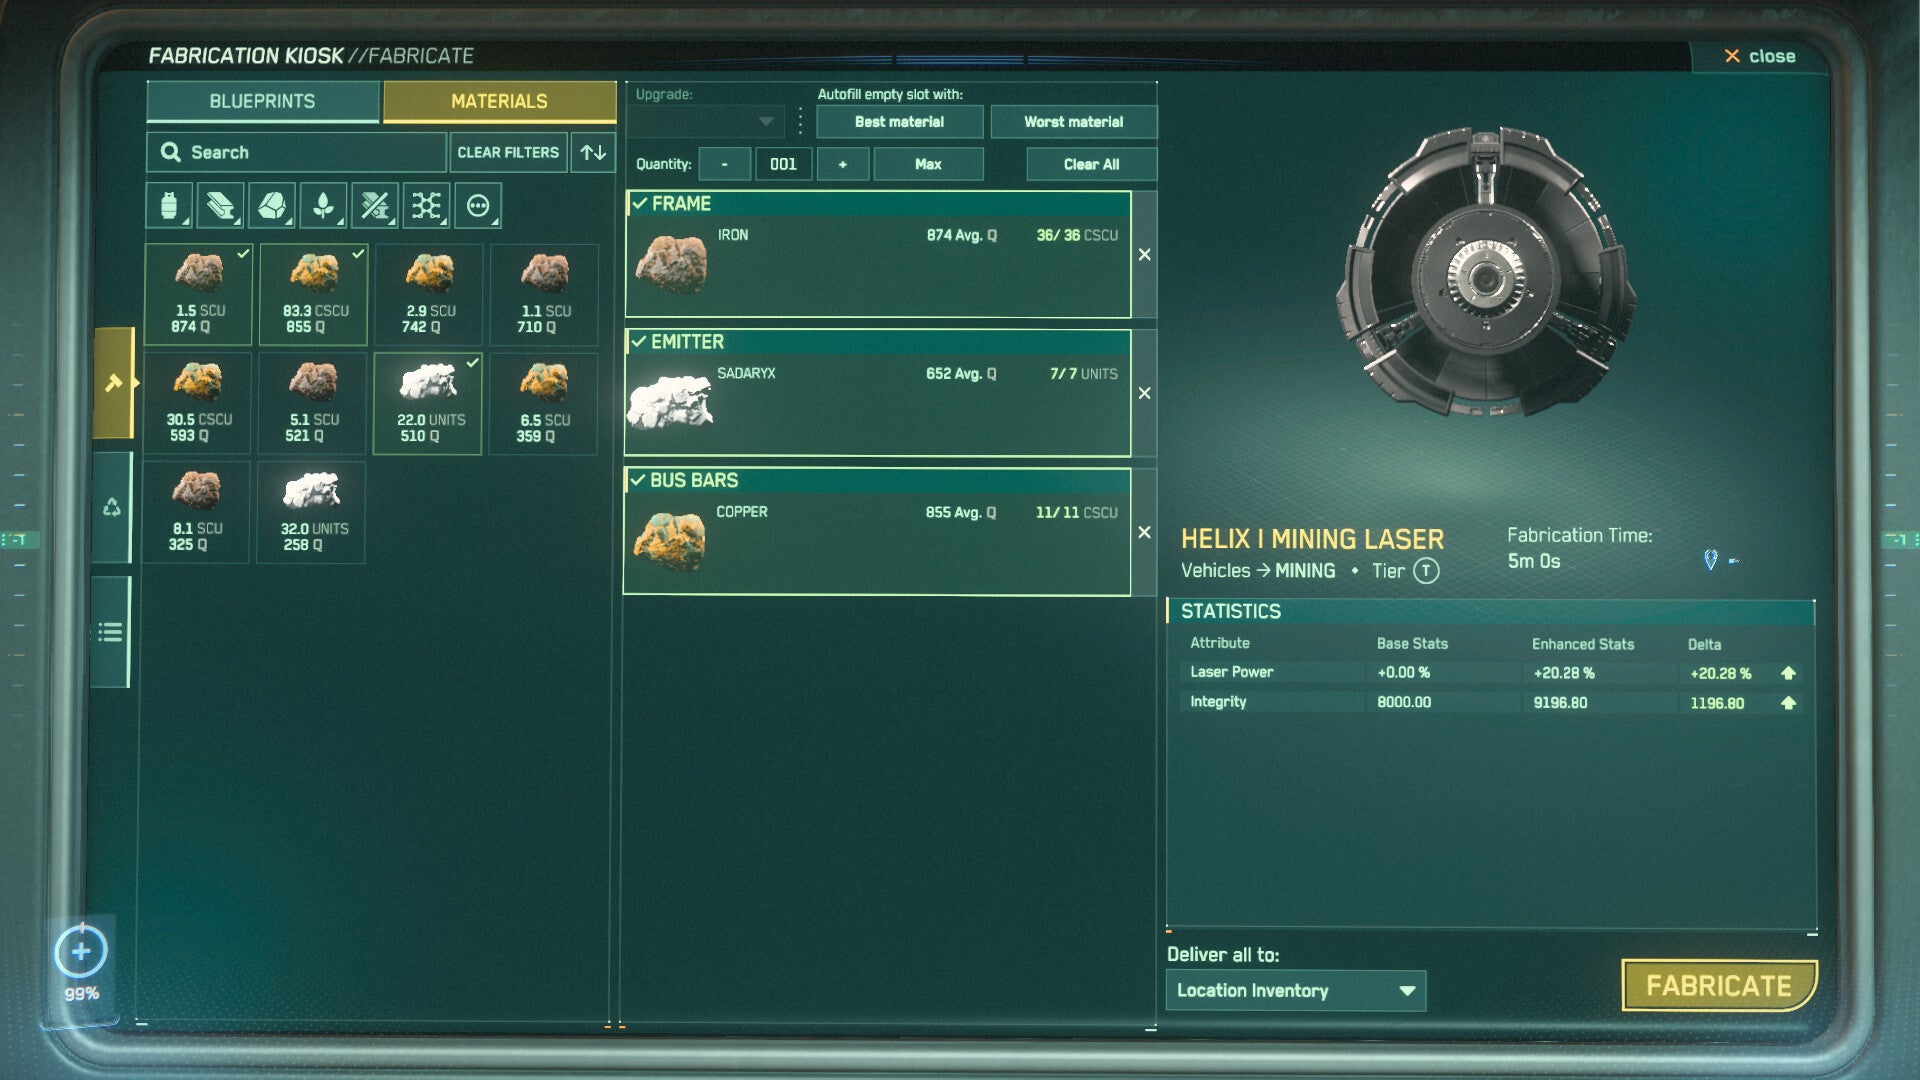
After selecting where you want the component to deliver, hit "Fabricate." After as few as several seconds to as long as 45 minutes, your components will be delivered to the specified location. If you are crafting somewhere other than your Spawn system, you must be present for the entire operation, otherwise you risk your hangar de-instancing and loosing your craft.
Master Crafting and Quality
Quality
Quality for any mined material can, nominally, go from 0-1000, with 0 being unusable in the crafting process to 1000 being the maximum possible bonuses. Functionally the minimum for all ores is 330 and the maximum is 960. Any component of a blueprint crafted with 330 quality will yield a -6.8% stat adjustment. Any component crafted with 960 quality will yield a 18.4% stat adjustment. 500 quality is the same as store-bought and is also the quality yield from dismantling looted or store-bought goods.
Master Crafted
The vast majority of equipment has an approximately 20% boost to a secondary stat, and 40% boost to a primary stat when Master Crafted with all components using 960 quality materials. For most FPS weaponry that would be a 20% boost to damage per bullet and 20% boost to penetration (ignoring armor values) or rounds per minute, those being the primary stats. Secondarily a 20% reduction in recoil or 20% boost to handling. This pattern holds true for every blueprint. For the purposes of this guide, referencing the mining laser chart, a Helix 1, with the 40% boost in mining output and the 20% boost in structural integrity, with max power mods can now handle deposits twice the size of a base Helix 1.
Next Steps
By engaging with the gameplay loop to increase your resource gathering efficiency several steps at a time and then master crafting a mining loadout, a solo player can now handle the vast majority of deposits in Star Citizen 4.9. This will allow you to mine and refine for any ship component, character gear, or consumable you'd like and master craft it, giving you a major edge in any content you wish to engage with.
Works Cited
"Calculator" #DPSCalculator, https://erkul.games/calculator, accessed 08/16/2026
"Rock Breaker Calculator" Star Citizen Mining Tool, https://rockbreaker.peacefroggaming.com, accessed 08/16/2026
"SC Craft Tools" Star Citizen Crafting Database, https://sc-craft.tools, accessed 08/16/2026
"Refineries - Mining" UEX, https://uexcorp.space/mining/refineries, accessed 08/16/2026
"Resource Guide" SCMDB, https://scmdb.net/?page=mine, accessed 08/16/2026
"Mission Database" SCMDB, https://scmdb.net, accessed 08/16/2026
"RediMake Item Fabricator" Cornerstone Universal Item Finder, https://finder.cstone.space/Misc1/ca94de5b-178e-4642-b374-22c9590e59b3, accessed 08/16/2026
"Drake Golem" Roberts Space Industries, https://robertsspaceindustries.com/en/pledge/ships/golem/Golem, accessed 08/16/2026
"MISC Prospector" Roberts Space Industries, https://robertsspaceindustries.com/en/pledge/Standalone-Ships/Prospector, accessed 08/16/2026